8 Cool Torres del Paine Hikes + Adventurous Things to Do

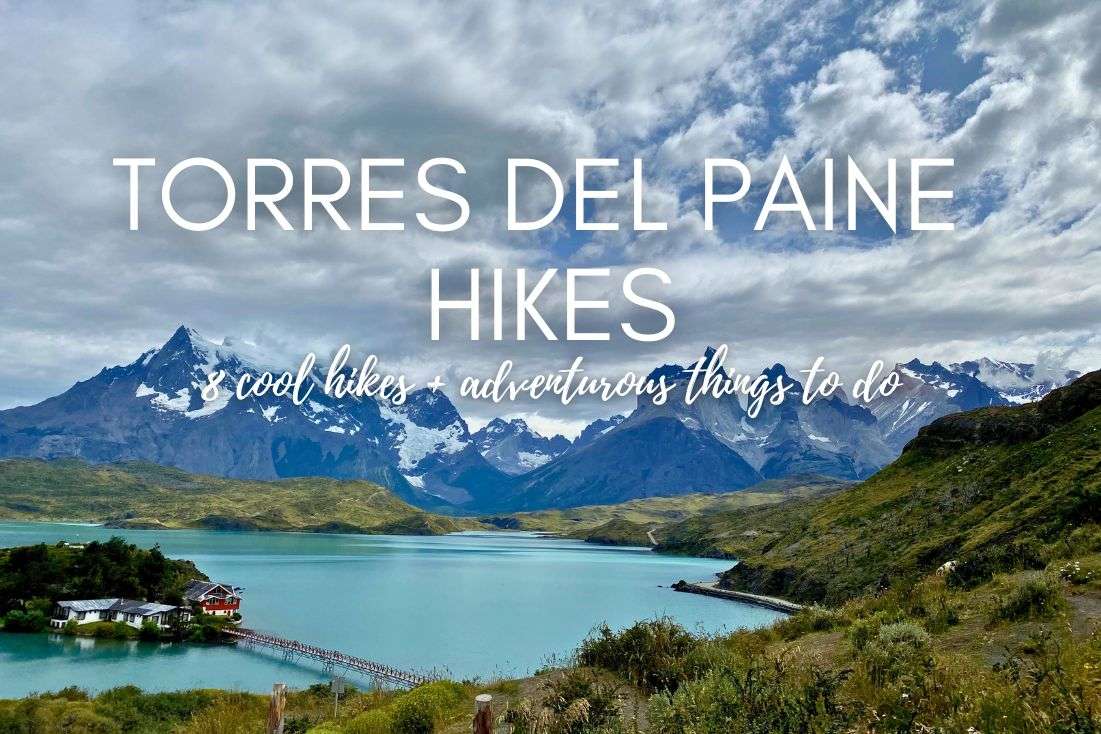
Ready to explore the best of hiking in Torres del Paine National Park? I’ll show you the top Torres del Paine hiking trails and adventurous activities you can't miss, whether you're looking to trek without a guide or see what's beyond the hiking trails. From the iconic Base Las Torres hike to thrilling adventures like kayaking to Glacier Grey, I have all the activities in Torres del Paine covered.
If you visit just one place in Chile, make it Torres del Paine. For me personally, this is the most beautiful national park in Chile. There are some incredible hikes in Torres del Paine that’ll knock your hiking boots off with minimal to large effort—all you need to do is find the right information (you’re on the right track for that) and plan your trip right (getting there!).
What should you expect to see? Massive mountains, turquoise blue lakes, million-years-old glaciers... I’m usually not sentimental but I fell in love with this place. Dare I say, it’s on the same level as Yosemite National Park. The atmosphere reminds me of the fjords in Norway, just better (I can say that, because I’ve been there—see how I liked the fjords in Norway!).
Ok, let’s get into it, I’m excited just reminiscing about my adventure in Torres del Paine.
The top hiking trails and things to do in Torres del Paine:
- Mirador Base las Torres hike (9 hours)
- Condor Lookout trail (1 hour)
- Cuernos Lookout trail (2 hours)
- W Circuit Trek (4–5 days)
- O Circuit Trek (7–9 days)
- Kayaking to Grey Glacier
- Boat excursion to Grey Glacier
- Ice walk on Grey Glacier
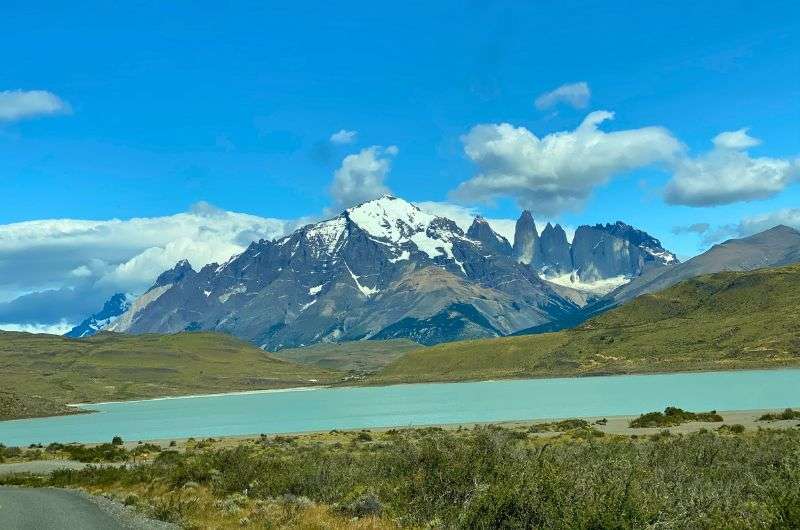
Chasing the glaciers in Torres del Paine
How many days do you need in Torres del Paine?
To experience the highlights of Torres del Paine National Park, plan for at least 3-5 days. This gives you enough time to explore the iconic day hikes, like the Base Las Torres trek, and take part in other activities too, like kayaking or a boat excursion to Grey Glacier. If you're doing multi-day treks, a week or more is necessary.
Tip! Read my Torres del Paine Travel Guide to get all the practical information for planning your trip: getting there and around, where to base yourself, how to buy tickets, and much more.
How to spend 3 days in Torres del Paine National Park?
If you’re looking for a quick itinerary and only have 3 days in Torres del Paine, here’s how you could plan your time:
- Day 1: Hike to the Base of the Towers (Mirador Base Las Torres), the most iconic day hike in Torres del Paine.
- Day 2: Take a boat excursion to Glacier Grey or kayak on Lago Grey (this is a must-do!).
- Day 3: Explore shorter hikes, like the Mirador Cuernos or Condor Lookout, and soak in more of the park’s stunning landscapes.
But like I said, try to spend at least 5 days in Torres del Paine. You won’t be bored even in a week! The hiking, the views, the sheer wonder of Patagonia will keep you buzzing day in and day out.
Tip: Read my Chile itinerary for 3 weeks to see how I fit Torres del Paine into my trip plan.
Are there animals in Torres del Paine??
Oh yeah, there’s the random guanaco (relative of the llama), fox, or deer prancing about in Torres del Paine. Some people count wildlife spotting in Torres del Paine as an activity; I just took it as a bonus of kayaking if I saw a condor over my head or a fun addition to hiking if there were guanacos close to the trail. And if you’ve heard that there are pumas in Torres del Paine, you’re right! But you most likely won’t see them unless you’re very unlucky. Your chances to see one safely increase if you join a guided wildlife tour.

Are you ready to explore the end of the world?
5 Best Torres del Paine hikes (top short- and multi-day options)
If you’re like me, you’re looking to hike in Torres del Paine without a guide on some of the best day hikes in the national park. Sure, you could also go out on the famous multi-day hike, the W Circuit or O Circuit, but I’ll just give you the basics about that long trek, since I haven’t done it myself. I’m not a tent-and-sleeping-bag kind of guy. Luckily, you can see the best bits of it on shorter trails:
1. Mirador Base Las Torres Hike (9 hours)
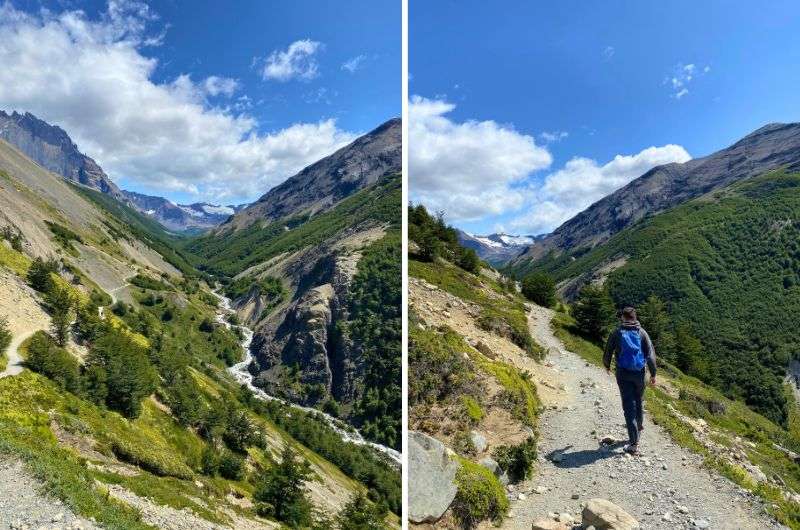
On the long journey to Mirador Base Las Torres
- Distance: 20 km (12.4 mi)
- Elevation gain: 990 m (3,200 ft)
- Difficulty: Hard
- Hiking time: 8–9 hours
- Trailhead: Google Maps link to trailhead (Welcoming Center)
This is THE hike—the one that takes you to the legendary Torres del Paine peaks, those three towering granite spires that look like they were ripped straight from a fantasy novel. This trek is the crown jewel of Torres del Paine National Park; some would say it’s the most famous hike in all of South America.
It’s also the initial stretch of the W Circuit trek, so if you’re not up for tackling that multi-day beast, at least you know you can knock out this famous section of it.
Start your hike early in the morning at the Torres del Paine Welcoming Center. If you're new to hiking, consider hiring a guide. Trust me, it's not the kind of trail where you want to wing it if you're inexperienced. We did it on our own, but let’s just say there was some huffing and puffing along the way.
Tip: Keep your eyes peeled—we spotted deer and woodpeckers, which was a nice distraction from the uphill grind!
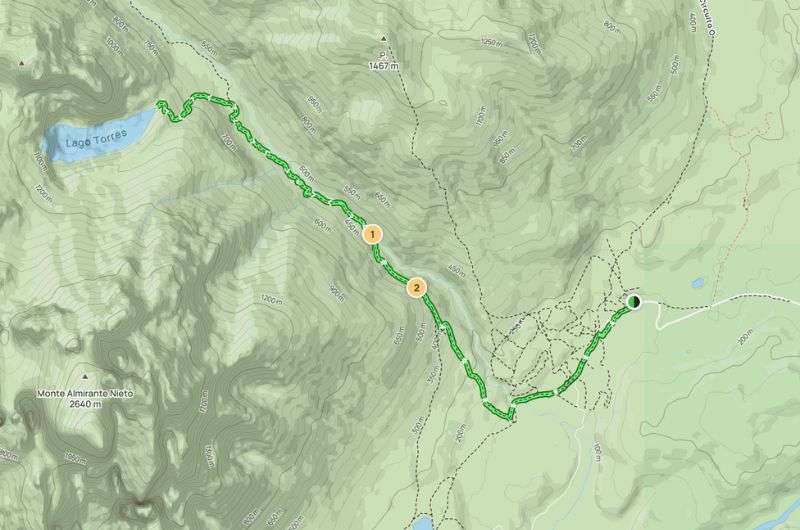
Map of Mirador Base Las Torres hiking trail (details on Alltrails)
Now, don’t get me wrong—the first part of the trail? Kind of "meh." Not a lot to write home about, but stay strong because the payoff is unreal. After a solid 4–5 hours of hiking, depending on your pace, you’ll arrive at the iconic lake with the three Torres del Paine peaks towering above you. It’s the kind of view that’ll stop you in your tracks and leave you babbling incoherently because your brain can’t quite process the insane scale of it all.
These granite spires, originally dubbed the “Cleopatra Needles” by early explorers, shoot up to nearly 3,000 m (9,350 ft). Meanwhile, you’ll be standing at about 850 m (2,788 ft) at the lake’s edge, which means your eyes will be trying (and failing) to process a 2,000-meter vertical wall in front of you. I was literally standing there, speechless, my brain turning to mashed potatoes as I tried to comprehend what I was seeing.
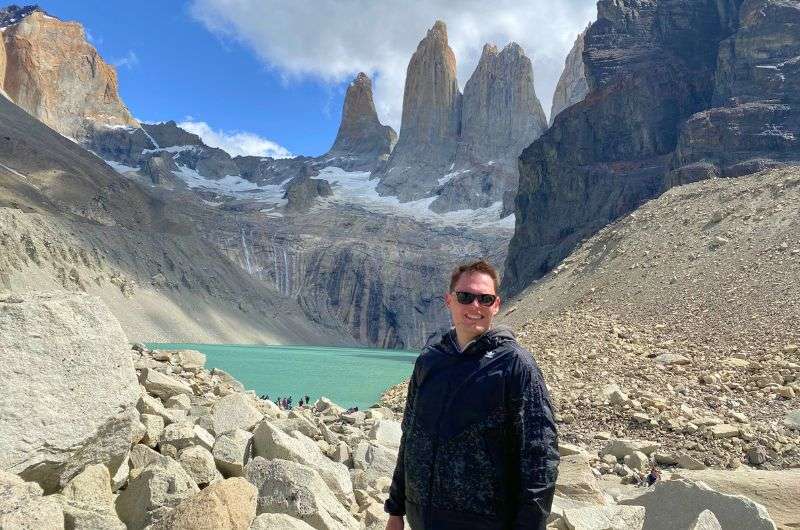
Mirador Las Torres with the national park’s legendary peaks just across the lake
That view when you reach the end of the Mirador Las Torres trail is worth every single step. Make sure you take a minute (or 20) to just soak it in because, honestly, photos don’t even come close to doing it justice. When you finally make it back down, grab yourself a beer. You’ve earned it after a long day's hiking!
Fun fact: The three towers were actually never climbed because it’s too dangerous. With the incredibly strong winds, the climbers would become airborne before reaching the peak.
2. Condor Lookout hike (just 1 hour!)
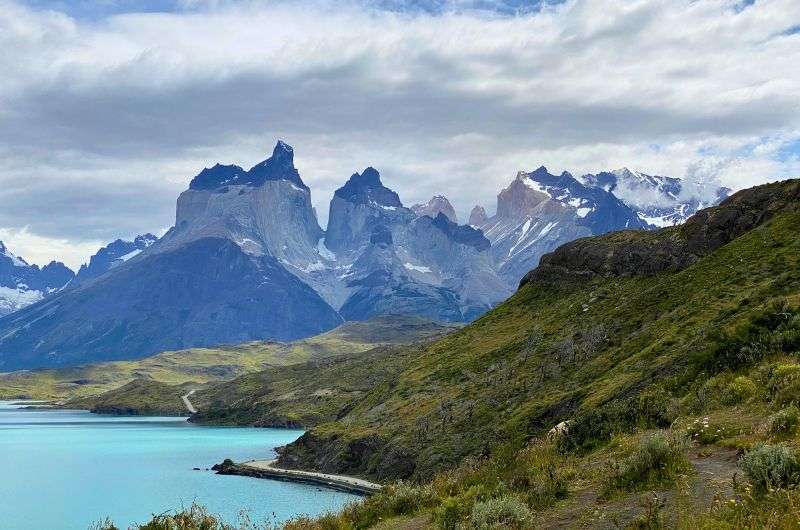
The Condor Lookout hike—disgustingly perfect
- Distance: 2.3 km (1.5 mi)
- Elevation gain: 215 m (705 ft)
- Difficulty: Easy to moderate
- Hiking time: 1 hour
- Trailhead: Google Maps link to trailhead
This next day hike is short and sweet and great for anyone, but still delivers fantastic vistas—the Condor Lookout hike offers the best “easy” views in Torres del Paine Natinoal Park. You’ll get 360° views of Lake Pehoe and the Los Cuernos peaks, plus the Southern Patagonia Icefield. It’s a huge ice plain that has stayed around from the last Ice Age.
The trail to Condor Lookout is a bit steep, not gonna lie, and it’s a steady climb the whole way to the viewpoint, but you didn’t think you’d get the views completely for free, right? This is Patagonia, after all! And really, it’s nothing major, and you’ll forget about the effort the moment you see those views anyway.
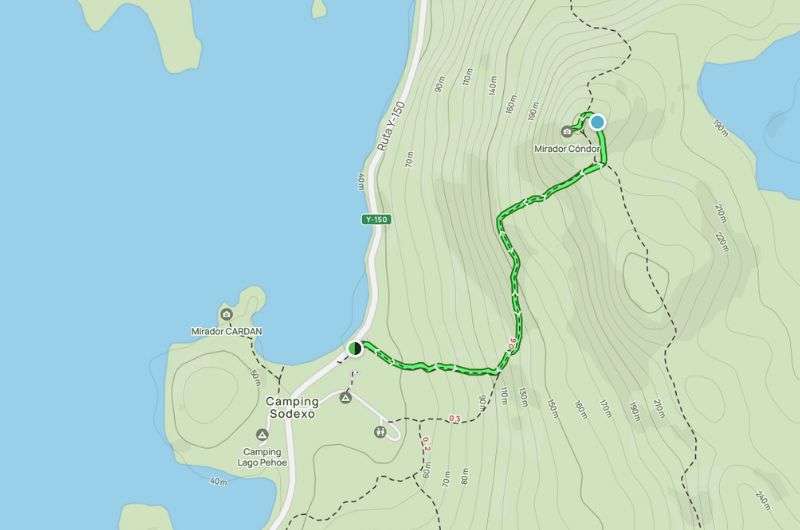
The Condor Lookout hike is short and sweet with incredible views! Map details on Alltrails
We could see and hear the rumble of the ice cracking and falling in parts—a very exciting experience. Yes, you too will start checking under your own two feet to see if you’ll fall through to the Earth’s core or not.
And now, the million-dollar question: Is it called Condor Lookout because there are condors or because you have the condor-view of the landscape? Both. In fact, the condors have their nest just below the rocky promontory.
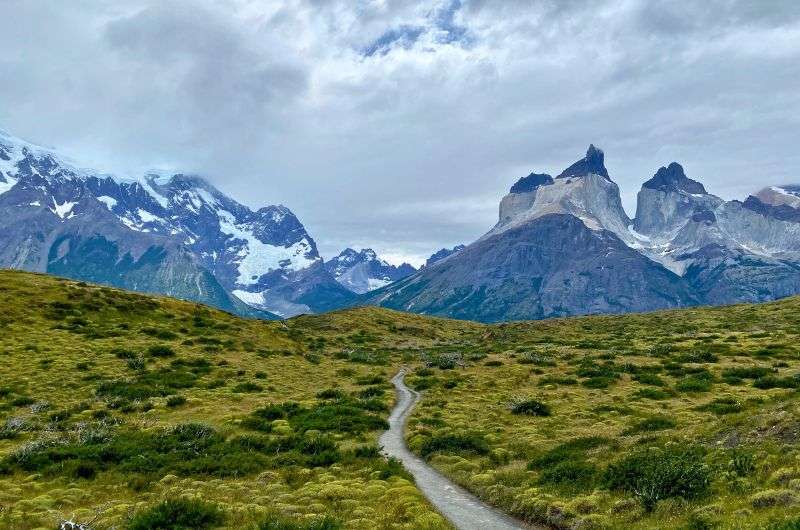
You can’t help but love this trail. It’s so short, but so good!
3. Cuerno Lookout Hike (2 hours)
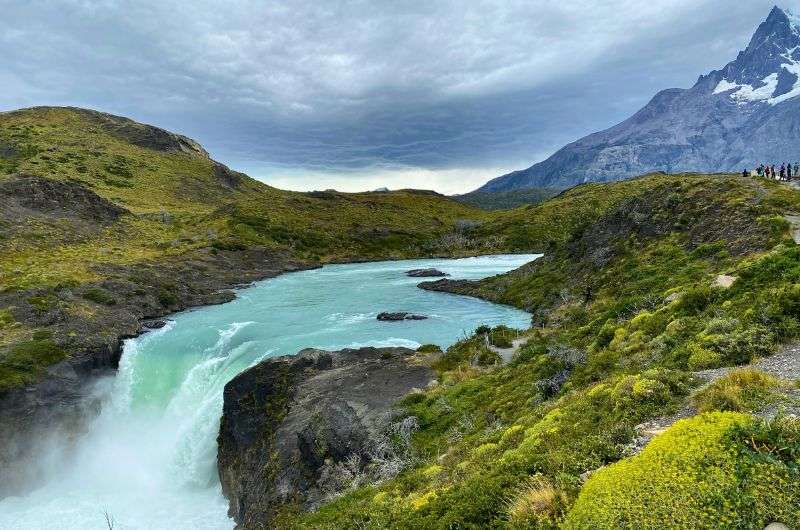
Salto Grande Waterfall on the Cuernos Lookout Trail
- Distance: 6.4 km (3.9 mi)
- Elevation gain: 194 m (636 ft)
- Difficulty: Easy to moderate
- Hiking time: 2 hours
- Trailhead: Google Maps link to trailhead
The Cuernos Lookout Hike (Mirador Cuernos) is another perfect snapshot of what makes Patagonia one of the most jaw-dropping places on Earth, without the lung-busting climb. This 6.4 km (4 mi) out-and-back trail offers an easy-to-moderate adventure for those looking to experience some of the park’s signature views—without feeling like you’re auditioning for a Patagonia survival show.
Unlike the more grueling treks like the Las Torres hike, the Cuernos Lookout is a relatively flat walk with only a gentle elevation gain. It has a lot of short up and downs keeping it fun, but nothing major. The trail is well-marked, easy to follow, and great for hikers of all levels, so you can focus on the views without worrying about getting lost.
You can park your car right at the trailhead. The whole thing takes around 2 hours; we combined this hike with the Condor Lookout Hike, turning it into a perfect half-day trip.
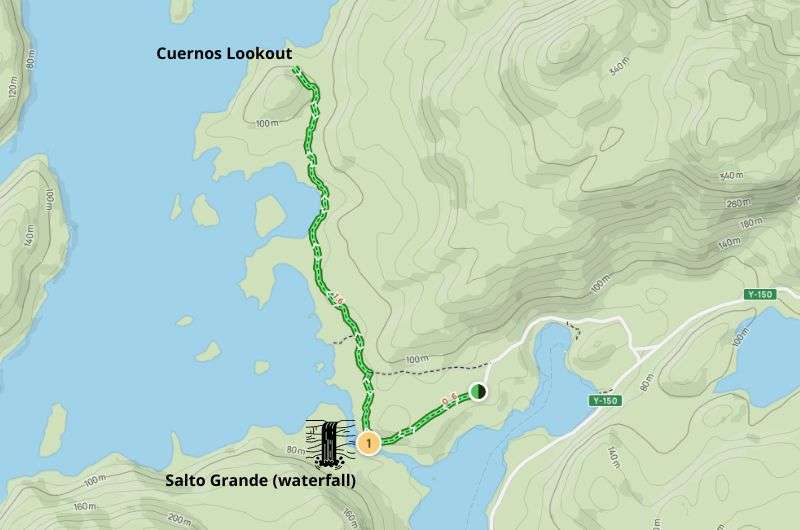
You’ll see the Salto Grande Waterfall just 0.6 km (0.4 mi) into the hike (map details on Alltrails)
And what will you be looking at on the Cuernos Lookout trail? Oh, just sweeping views of Lake Nordenskjöld, with the jagged peaks of the Cordillera del Paine and the Valle del Francés (French Valley) in the background.
The first major landmark you’ll encounter is the Salto Grande Waterfall. This isn’t just any waterfall—it’s the dramatic meeting point between Lake Nordenskjöld and Lake Pehoé, and it’s as thunderous and mesmerizing as you’d expect. You'll definitely want to linger here for a bit to snap some photos and just soak it all in.
From there, the trail continues to the viewpoint, where you’ll get an up-close look at the Cuernos del Paine, or the “Horns of Paine.” These are granite peaks that are sharp, dramatic, and absolutely iconic. The contrast of the dark peaks against the bright blues of the surrounding lakes is what makes this viewpoint such a stunner.
One thing I loved about this hike: it was way less crowded than the Las Torres trail, so you actually get to enjoy the silence and solitude of Patagonia. No jostling with selfie sticks here. Plus, if you’re lucky (or maybe just a little patient), you might spot some wild llamas (guanacos), and if the weather’s right, there’s a good chance you’ll see a rainbow arching over the lakes. We just managed to see one of the two:
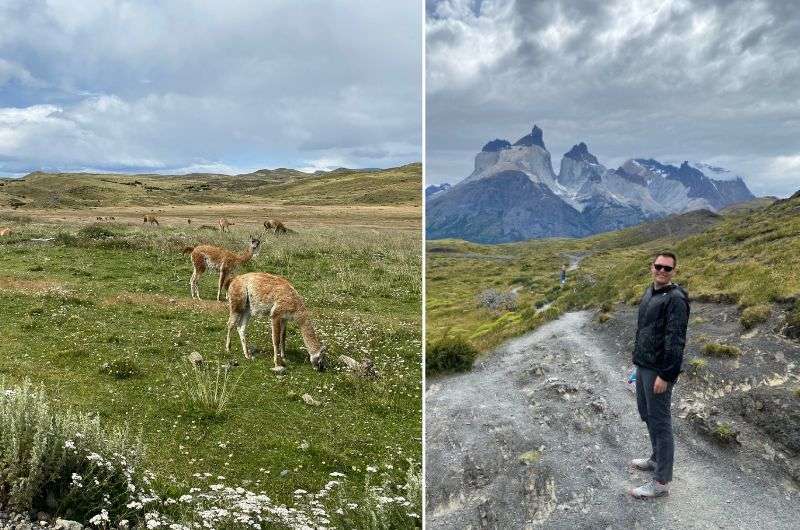
Guanacos right next to the trail! But no rainbows
4. W Circuit Trek (4–5 days)
- Distance: 73 km (45 mi)
- Elevation gain: 3,023 m (9,918 ft)
- Difficulty: Hard
- Hiking time: 4–5 days
- Trailhead: Google Maps link to trailhead (Welcoming Center)
This hike is the OG Torres del Paine trail: the W Circuit Trek. It’s the ultimate multi-day trek that takes you to all of the highlights of the park: Las Torres, Los Cuernos, French Valley, Paine Grande, and Grey Glacier. You start at the Torres del Paine Welcoming Center and then head west (some people go in the opposite direction, but then you leave the hardest bit for last!).
You can see the trail looks like a ‘W’, hence the name of the hike:
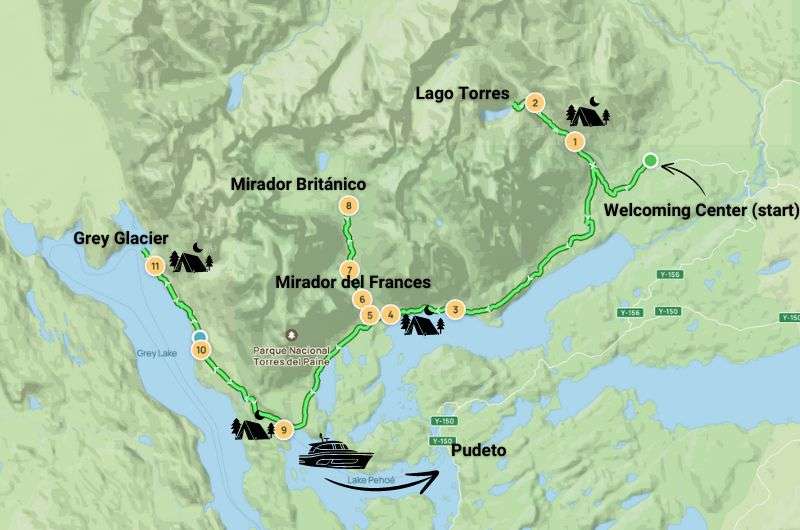
Map of the W Circuit (see why it’s called that?). Map details on Alltrails
The whole trail is well marked though not extremely well maintained, with nice camp sites, some with mountain huts. The views are non-stop on the hike. Like… life-altering amazingness. The trails are sometimes moderate and sometimes very rocky and steep, but overall very doable for anyone of a reasonable fitness level that put some effort into preparations.
You’ll want a good pair of shoes, a whole stack of layers so you’re ready for all weather conditions (you WILL get all weather conditions!), and hiking poles. Not so much for the walking, but to hold your balance when you’re shocked when you hear those avalanches! Hikers I’ve talked to have heard multiple on this hike, especially in the area around Mirador del Frances—must be quite a chilling experience!
The best time to hike the W Circuit is from November to March when it’s summertime in Chile. The wind will be as strong as ever, but the weather will be more lenient and more pleasant for spending days on end outside. If you decide to go in the winter, make sure to get a guide—it’s mandatory in the winter months.
Suggested itinerary for 5 days on W Trek:
Day 1: Welcoming Center to Chileno via Lago Torres (13.8 km/8.5 miles) 8 hours
Day 2: Chileno to Francés (18 km/11.2 miles) 7 hours
Day 3: Francés to Paine Grande campsite + via Mirador Británico (20.3 km/12.6 miles) 9 hours
Day 4: Paine Grande campsite to Glacier Grey (11 km/6.8 miles) 4 hours
Day 5: Glacier Grey back to Paine Grande campsite (11 km/6.8 miles) and then a ferry to Pudeto + bus to Laguna Amarga
5. O Circuit Trek (7–9 days)
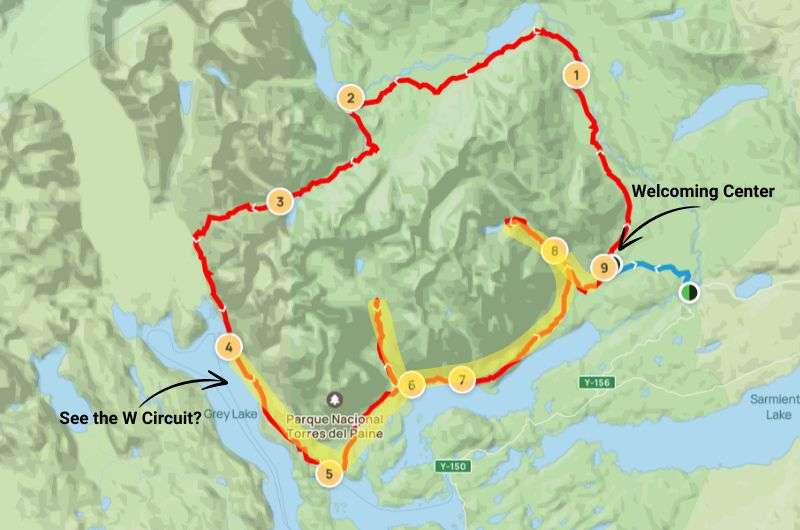
Map of O Circuit Trek in Torres del Paine. I highlighted the included W Circuit for you (get full map on Alltrails)
- Distance: 110 km (68 mi)
- Elevation gain: 4,200 m (13,780 ft)
- Difficulty: Hard
- Hiking time: 7–9 days
- Trailhead: Google Maps link to trailhead (Welcoming Center)
The O Circuit is the ultimate challenge for those wanting to hike Torres del Paine National Park in all its wild glory... or so they say—I haven’t done this hike myself as I stick to day hikes instead. But here’s what I know about it:
This full-circuit trek takes you around the entire park in a whopping 110 km (68 mi) circle, including all the highlights of the W Circuit—Las Torres, Los Cuernos, French Valley, Paine Grande, and Grey Glacier—but also ventures into the park's more remote northern section. Here, you’ll hike through less-crowded paths, dense forests, and even cross the challenging John Gardner Pass, where the views of the Southern Patagonian Ice Field will blow your mind.
The trailhead is the same as the W Trek, starting at the Torres del Paine Welcoming Center, but you'll take a loop around the park counterclockwise.
The trail is well-marked but includes some very rugged sections, with some steep ascents, including the infamous John Gardner Pass—prepare for strong winds and a high chance of all sorts of weather. Bring top-notch gear: reliable boots, layers for all possible weather scenarios, sunscreen and sunglasses (I swear they saved my life in the mountains!), and trekking poles to help you on those steep descents.
Suggested itinerary for 7–9 days on the O Trek:
Day 1: Welcoming Center to Serón (13 km/8 mi)
Day 2: Serón to Dickson (19 km/12 mi)
Day 3: Dickson to Los Perros (12 km/7.5 mi)
Day 4: Los Perros to Grey Camp via John Gardner Pass (22 km/13.7 mi)
Day 5: Grey Camp to Paine Grande (11 km/6.8 mi)
Day 6: Paine Grande to Francés (20 km/12.6 mi)
Day 7: Francés to Chileno (18 km/11.2 mi)
Day 8: Chileno to Welcoming Center via Las Torres (13.8 km/8.5 mi)
Adjust the itinerary based on your pace and camping preferences. It can go a day longer or shorter if you add or skip some campsites.
3 more top things to do in Torres del Paine National Park
1. Kayaking at Glacier Grey
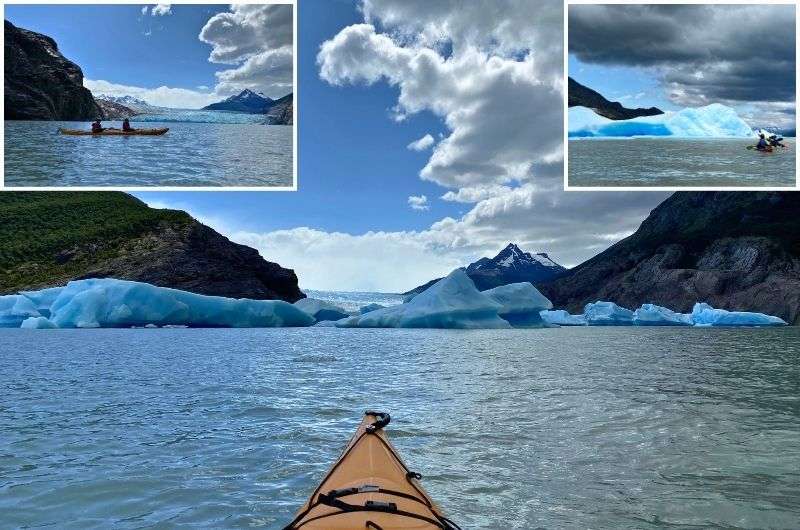
Kayaking near Glacier Grey was my favorite thing to do in Torres del Paine
I loved this adventure so much! The absolutely best experience in Patagonia is kayaking to Grey Glacier. This is one thing to do in Torres del Paine National Park that you’ll need to book in advance because the ferry to the base camp leaves just a few times a day (see next item below). I have to say, my bank account cried when I planned this trip, but it was worth it.
2024 prices are around USD 170 per person and don’t take into account getting to Refugio Grey—great for people on the multi-day W Trek, not so great for the rest of us. The ferry will cost you another USD 110 round-trip.
We booked a trip through Lago Grey Hotel, but there are several agencies that also do the trip. Bigfoot Patagonia seems to be the best-reviewed one.
Kayaking trips leave from Refugio Grey. Once we got to the base camp, we got our gear and kayak, listened to a safety briefing, and headed out on the lake. This was one of the most intense experiences of my life. We floated around the massive glaciers among pieces of deep-blue ice sheets.
The kayaking expedition lasted about 2.5 hours, and we savored every minute of it. The tour was informative and the surroundings were jaw-dropping. There’s no life in the lake—turns out the glacier sediment blocks sunlight, making it impossible for anything to survive in those waters.
2. Boat excursion to Glacier Grey
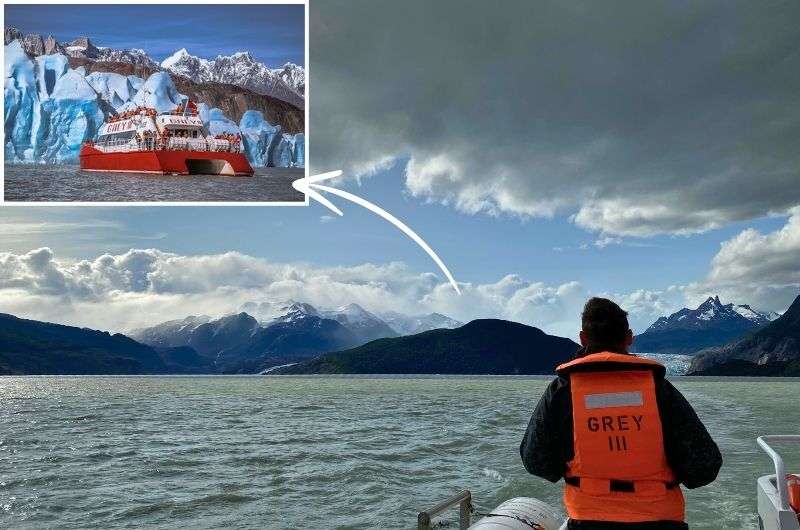
Heading out on the ferry to Refugio Grey... I got off and kayaked, but you can just treat it as an all-day boat excursion. Details on Hotel Lago Grey’s website (which is who operates the boats)
If you’re not into the whole hiking or kayaking thing but still want to check Glacier Grey off your Patagonia bucket list, the boat excursion is your golden ticket. This is the same ferry you’d take if you wanted to kayak at Refugio Grey, just without the kayaking.
You’ll cruise across Lago Grey for nearly three hours and then 3 hours back again, and let’s be honest—it’s for those of you who want all the glacier glory without the sweat. And hey, no judgment (okay, maybe a little), but you do have to walk 30-45 minutes along Grey Beach just to reach the boat. So, yes, you’ll still have to put in some effort. But once that’s out of the way, it’s smooth sailing, literally.
As you float along, you’ll be treated to epic views of Paine Grande Mountain, the Paine Massif, forests, and peaks that scrape the sky. The highlight? Seeing those massive chunks of glowing blue glacier ice right in front of your face—and if you’re lucky, you might even catch one breaking off and crashing into the water. I don’t want to flex, but I did this in a kayak, which made it so much more exhilirating, but again, not judging those how opt to stay on a comfortable, modern boat.
The boat ride itself? About two hours and forty-five minutes of pure visual overload (though I have to say 6 hours of it seems a little much). Just make sure you’ve booked the right departure—only one of the four daily trips gets you up close and personal with the glacier, and you don’t want to be stuck squinting from afar.
Oh, and if you’re on a round-trip ticket, don’t get any ideas about hopping off at Refugio Grey. The boat might stop there, but unless you’ve got a one-way, you’re staying put. So, sit back, enjoy the views, feel that Patagonia wind slap you in the face, and tell yourself you’ll totally do something more active tomorrow.
3. Grey Glacier Ice Walk
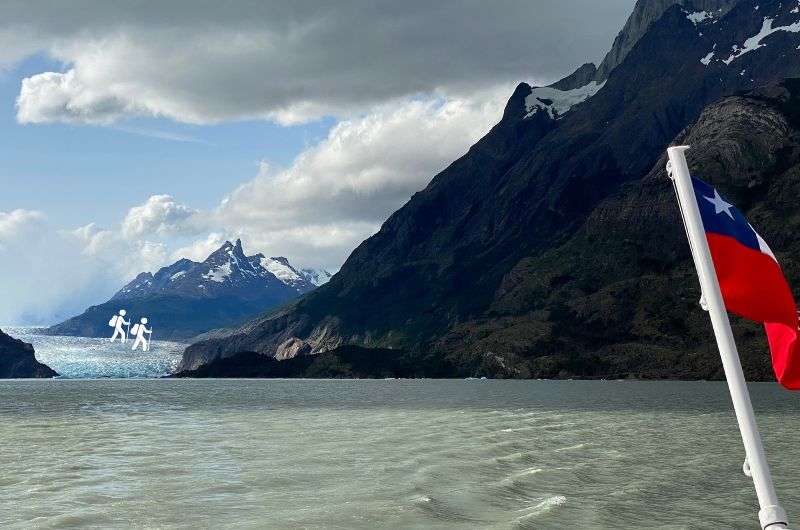
Us hiking on Grey Glacier...
Alright, I’m going to be honest—I didn’t do the Grey Glacier ice walk myself, but that’s only because I already tackled the ice over at Perito Moreno Glacier (best visited from El Calafate over in Argentina—here's a whole itinerary for that part of Patagonia). But if hiking on a glacier is on your bucket list and you’re visiting Torres del Paine National Park, Grey Glacier can scratch that itch. Here’s what I know about it:
The experience starts with a safety briefing before you hop into a rubber boat and take a short transfer. From there, you’ll do a 1-hour hike to access the ice safely (and yep, it’s a bit challenging—if your knees aren’t in top shape, you might want to reconsider). Once you’ve made it, your guide will get you geared up with crampons, a harness, helmet, and an ice axe, and then it’s go time! You’ll spend about 2.5 hours walking on the glacier, navigating the ice fields like a true Patagonian explorer.
If it’s anything like what I experienced over on Perito Moreno, you’ll leave feeling like you’ve just walked on another planet—surrounded by towering ice formations, surreal blue crevasses, and the humbling power of nature right beneath your feet. It’s a wild, unforgettable experience.
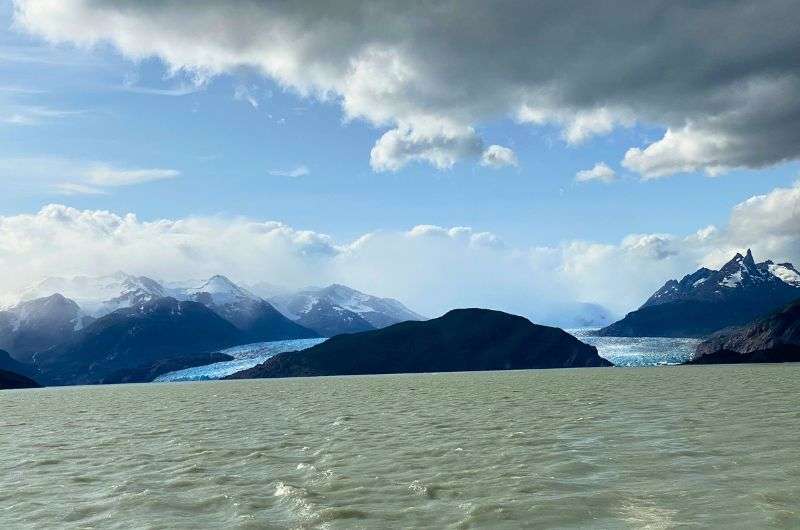
Another look on the Grey Glacier
Bonus! Torres del Paine fun facts
First, a lightning round of fun facts about Torres del Paine, to give you a quick snapshot of what makes this place so spectacular—both in terms of its natural beauty and its fascinating history.
- Size: Torres del Paine National Park spans 2,830 km2 (700,000 acres)—roughly the size of Luxembourg or 30 times the size of Manhattan.
- End of the World: Torres del Paine is part of the famous “End of the World” route because it's located in one of the southernmost regions of the planet, Patagonia, often called the last stop before Antarctica.
- Highest peak: Cerro Paine Grande, the tallest mountain in the park, stands at a towering 2,884 m (9,462 ft)—about three times the height of the Empire State Building.
- Visitors: Every year, Torres del Paine welcomes over 252,000 visitors, with 60% being international adventurers. The peak season runs from November to March.
- Trails: The legendary W Trek covers 60 km (37 mi), typically taking 4–5 days to complete. It’s one of the most famous trekking routes in the world.
- Grey Glacier: The largest glacier is about 6 km (3.7 mi) wide and extends for 28 km (17 mi) in length. It flows into Grey Lake, where massive icebergs break off, creating a surreal, icy wonderland that you can explore by hiking or boat (it was a kayak for us!).
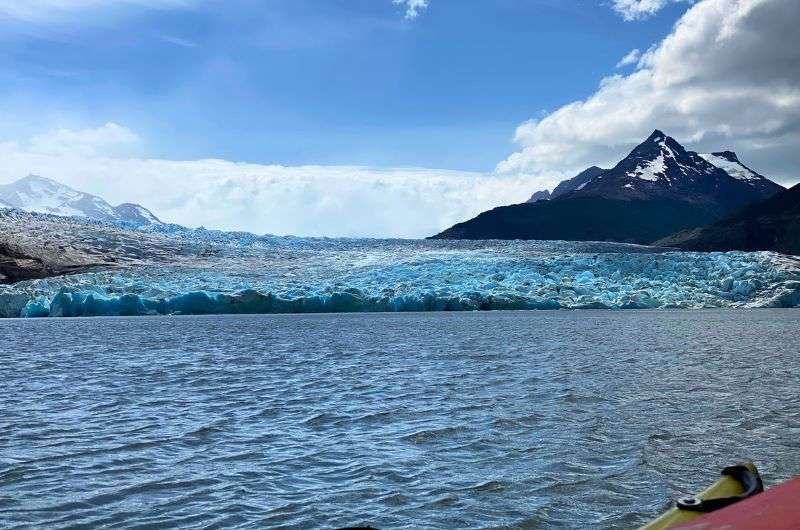
Grey Glacier from my kayak
- Lady Florence Dixie: In 1879, British explorer Lady Florence Dixie was one of the first non-indigenous tourists to visit the region. She wrote a book that romanticized Patagonia, drawing international attention to the area.
- The name: Torres del Paine National Park got its current name in 1970, meaning "Towers of Blue," referencing the striking granite peaks that dominate the landscape. Those famous towers are something you can't unsee once you're seen them with your own eyes!
- Wildlife: Torres del Paine is home to over 3,000 guanacos, elusive pumas, and more than 100 bird species, including the mighty Andean condor with a wingspan of over 3 m (10 ft)!
- Fire incident: In February 2005, a Czech backpacker accidentally started a fire (it wasn’t me!!) that burned 155 km² (60 sq miles)—equivalent to about 19,000 soccer fields! It took 10 days to get it under control. Sometimes, my country is famous for all the wrong reasons.
This post may contain affiliate links. We earn a small commission if you make bookings through my links, at no additional cost to you. This helps us keep this blog free, thank you!





Comments | Thoughts? Give us a shout!