
Overview of 2 days in Nikko + map
Where We Stayed, Nikko: Fairfield by Marriott
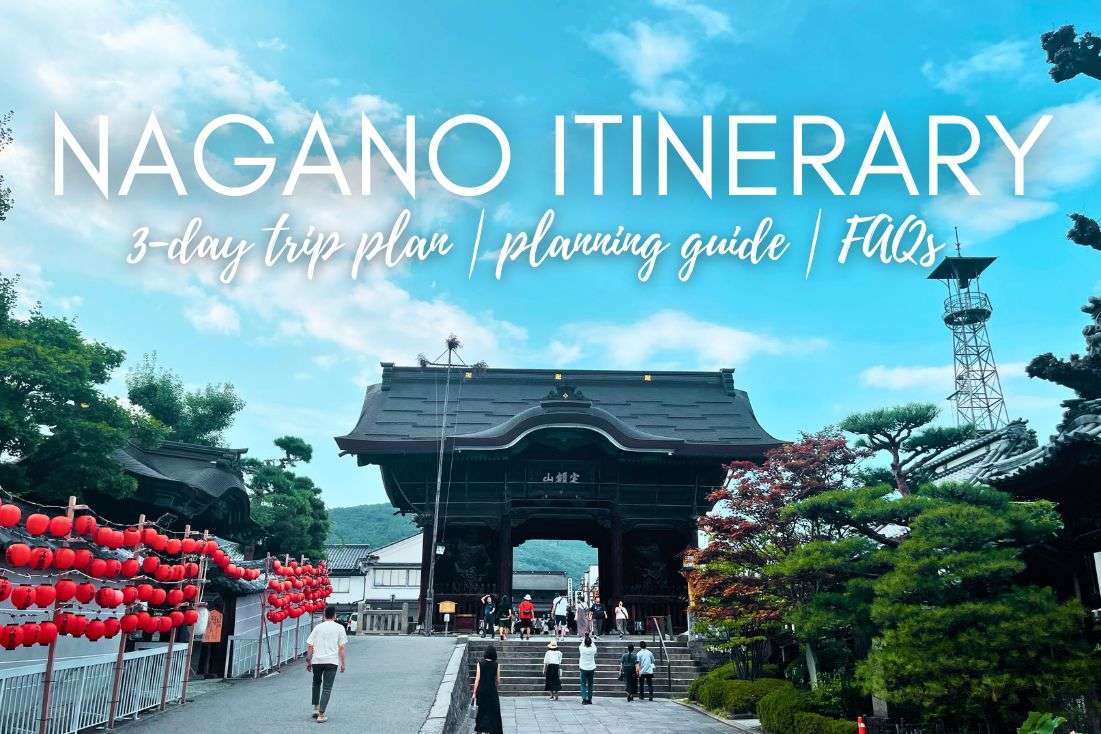
Day 1 of Nikko Itinerary: All the Amazing Shrines in Nikko National Park
Day 2 of Nikko itinerary: Nikko’s epic nature
How many days should I spend in Nikko?
Is Nikko worth a day trip from Tokyo?
What is the best time to visit Nikko?
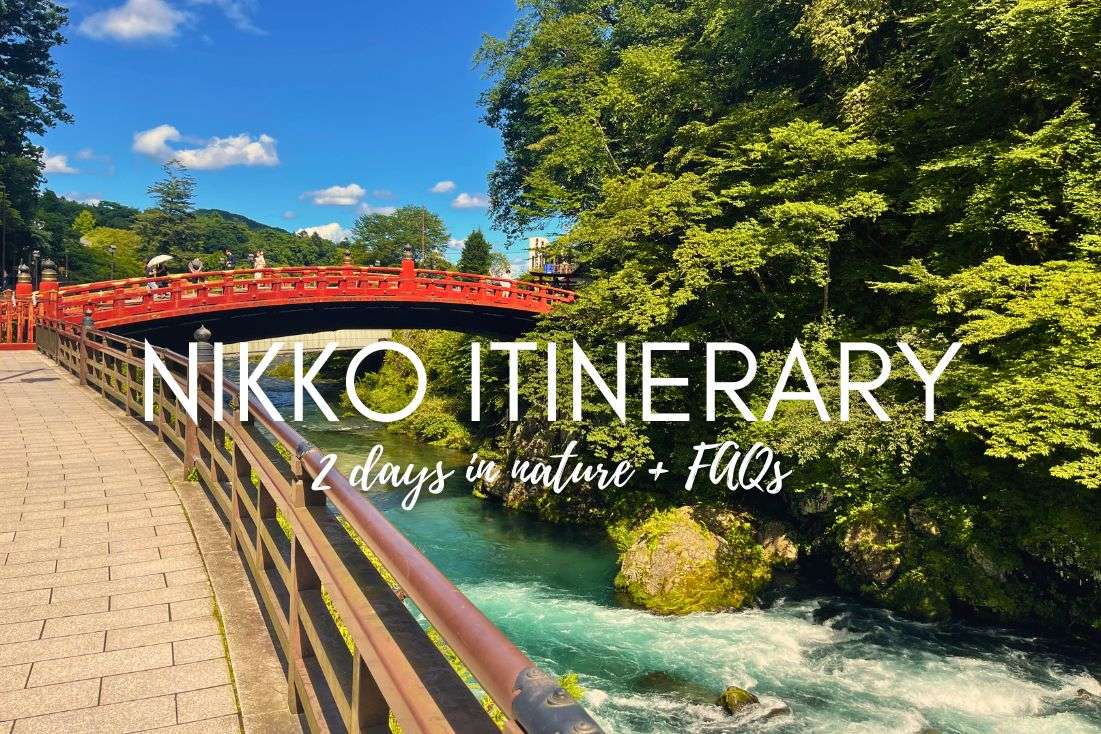
I put together this 2-day Nikko itinerary after multiple visits over the years, and I consider Nikko one of the best places to visit in all of Japan.
We all know Nikko is a national park, but few know it’s also a UNESCO World Heritage Site and one of the most visited places in Japan—and rightly so.
For my first visit, I didn’t know much about Nikko, then it shot right to the top of any of my Japan itineraries because of its unique combination of brutally beautiful nature (imagine waterfalls such as Kegon Falls and Ryuzu Falls, and mountains) and top-tier Japanese historical sites like the imperial Toshogu Shrine or the Imperial Villa.
There are so many places to see in Nikko that two days is the bare minimum to see it all.
Pro Tips to get your Nikko visit to the next level:
• Go Hiking, as in good weather, you can see Fuji Mountain, as I saw from the Hangetsuyama Hike
• Walk early morning between shrines to see the cedar forest in mist. It was absolutely magical for me.
I know some people want to visit Nikko as a day trip from Tokyo, but that’s a terrible waste of potential. Nikko deserves at least 2 days of your time, because the nature in these parts is second to none. I also have a 3-day Tokyo itinerary, if you'd prefer to explore both cities to the max.
In my list of top spots to see in Nikko, nature vs manmade attractions come out at a roughly 50:50 ratio, so it’s a perfect balance of everything. No surprise then that Nikko ended up shooting to first place in my favorite places I’ve visited in Japan. And which are all the places I've visited? Check out the whole section of Japan.
Check out the end of this article for FAQs related to planning a trip to Nikko, including when the best time to go is, how long I really think you need, and how important it is to rent a car.
Oh, and just a heads up—don’t expect Nikko to check all of your boxes. The restaurants were underwhelming to say the least.
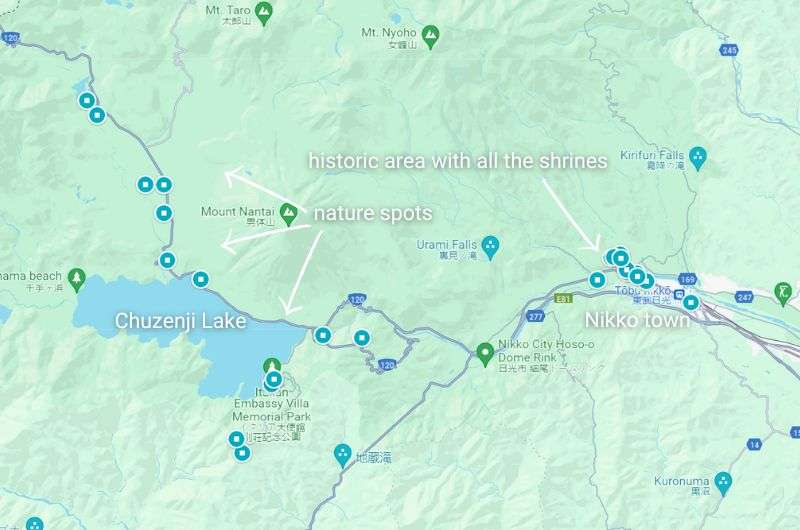
All the blue blobs are attractions in Nikko covered in this itinerary. You can get them all in my list on Google Maps, all you need to do is save the list and it’s yours.
These are the places you’ll visit on your 2 days in Nikko:
Day 1: Toshogu Shrine, Futarasan Shrine, Rin’nōji Taiyū-in Mausoleum, Rin’nōji Main Hall, Shinkyo Bridge, Nikko Tamozawa Imperial Villa
Day 2: Hangetsuyama Hike above Lake Chuzenji, Kegon Falls, Yudaki Falls and Yunoko Lake, Senjōgahara Marshlands, Ryuzu Falls, British and Italian Embassy Villas
To see all the spots on my itinerary, you’ll want to have your own car. Public transit works, but it takes longer and isn’t as flexible, so you’d need either more days in Nikko or to leave out some spots, which would be a shame.
The Fairfield by Marriott in Nikko comes highly recommended by yours truly—we were very happy with our stay there. It's a strategic choice for roaming the town, albeit with a price tag that might make your wallet wince just a tad.
Located conveniently close to the town center, it offers free parking, which you'll appreciate since you'll need wheels to really explore Nikko’s surroundings. The beds are massive, ensuring a good night's sleep, and the toilets? They're so high-tech you might catch yourself smirking mid-business. Easily my second favorite hotel in Japan.
If you're not following my advice and visiting Nikko as a day trip from Tokyo, check out my article on where to stay in Tokyo.
You absolutely should visit Nikko by car if you want to see everything in a meaningful amount of time, including all the natural attractions. If you're only interested in the historical sights, public transport and walking will probably be enough, as the historical area is very walkable.
Parking lots are plentiful in the Nikko area, so you won’t encounter any problems, even during peak times.
I found using Google Maps for public transport, especially in Kyoto and Tokyo, incredibly helpful, as the systems are well integrated with Google Maps. And since the Japanese are extremely punctual, you can just plug your route into Google Maps and you’re good to go.
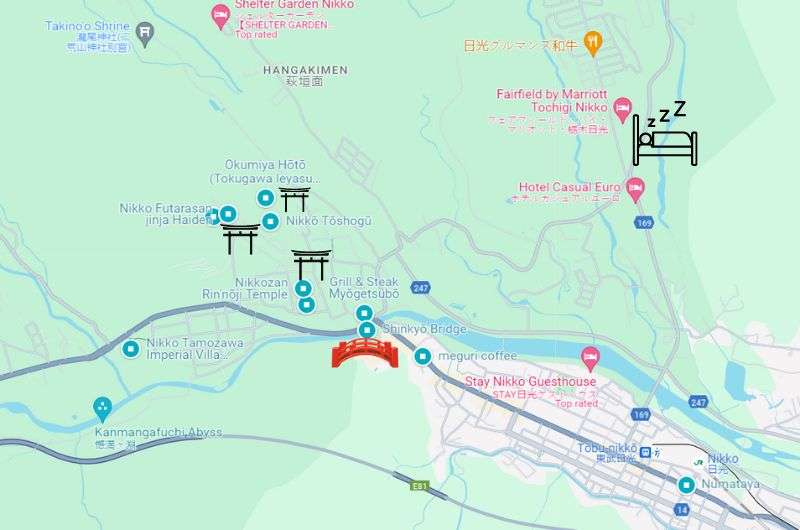
A map showing the stops on day 1 of your Nikko itinerary. Today, you’ll be staying close to town at the Fairfield by Marriott in Nikko
Main sites visited on day 1: Toshogu Shrine, Futarasan Shrine, Rin’nōji Taiyū-in Mausoleum, Rin’nōji Main Hall, Shinkyo Bridge, Nikko Tamozawa Imperial Villa
Restaurant tips: Grill & Steak Myōgetsubō | Numataya (sushi)
Hotel recommendations: Fairfield by Marriott in Nikko
Further reading: Top Attractions in Nikko
Your first day in Nikko will be spent in the historic area right by Nikko town, exploring impressive shrines and temples, all the while being surrounded by Nikko’s gorgeous nature. It’s so good you won’t be able to believe it’s a real place and not a movie set!
Remember that Nikko, especially the area where all of today’s attractions are, is hilly, so you’ll be walking a lot up and down hills and stairs.
You can manage all of the stops on the first day of your Nikko itinerary on foot, but if that sounds like a little too much effort, there are parking lots all over the place (though some can get full right in the morning, so expect to spend some time looking for a spot). Traffic can be frustrating, too.
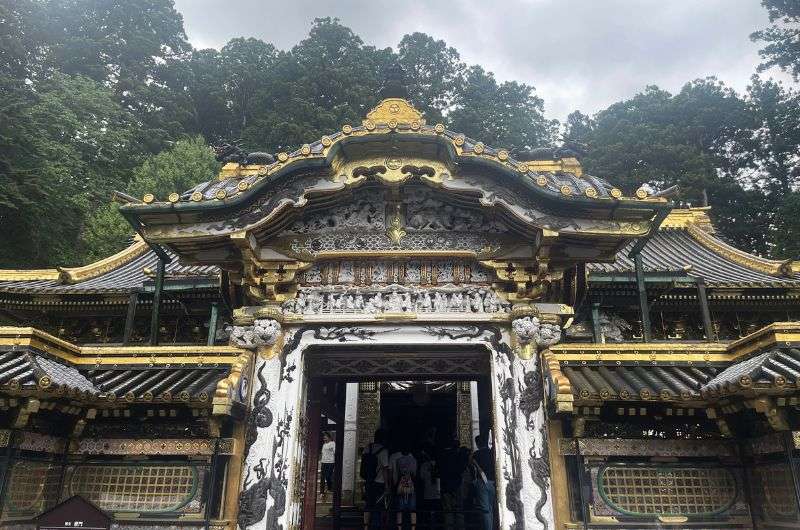
The entrance to Toshogu Shrine
Distance from Fairfield Marriott Hotel: 2 km (1.3 mi), a 5-minute drive
Time spent there: 1–1.5 hours
Price: JPY 1600
Opening times: 9 am–5 pm (you have to enter 30 minutes before closing at the latest)
The first stop in Nikko is Toshogu Shrine—an absolute must-see. It would trump most of Japan’s top shrines and temples, so don’t just read that it’s a mausoleum and assume “meh, probably just some dude’s grave”. First of all, yes, it’s the lavish final resting spot of Tokugawa Ieyasu, the founder of the Tokugawa shogunate, but it’s a lot more than that.
Toshogu is an entire complex with many halls and structures, and you’ll need 1.5 hours there to get a good look at everything. You can’t leave without finding the famous "See no evil, speak no evil, hear no evil" monkey carvings!
Arriving early is key—doors open at 9 am and trust me, by midday, it's mayhem—if you get there later in the day, the lines are off-putting.
If you’re driving, note that there are plenty of parking lots around (typically costing JPY 600–1000 per day—this parking lot is well located and big enough to not be full right away), but traffic gets crazy, so the sooner you find a spot, the better.
Get ready to leave your car in the lot for the better part of the day, so pack all your stuff with you when you head to the temples.
The entrance fee to Toshogu Shrine is JPY 1600. The White Gate, or Yomeimon Gate, is probably the most extravagant gate in Japan, decked out with intricate carvings and decorations that will make you stop in your tracks. It’s not dark or red like other shrines, but instead is designed in a flashy white and gold.
Toshogu’s main hall, while architecturally impressive, was a letdown on the inside. There’s next to nothing to look at, so you’re just shuffling around with the Japanese-speaking guide, trying to forget about the omnipresent foot smell (yes, you have to take your shoes off). So enjoy the sights (and smells) while you’re outside. If there’s a line to get into the main hall, I say skip it altogether.
Then, maybe do a stretch or two, because it’s time to hike up the sizeable staircase to the actual tomb above the main hall. Along the way, the lush greenery really adds to the drama of the place.
Hike back down and off you go to the next stop! It’s right next door… which, considering you’re in a national park, means a nice forest walk.
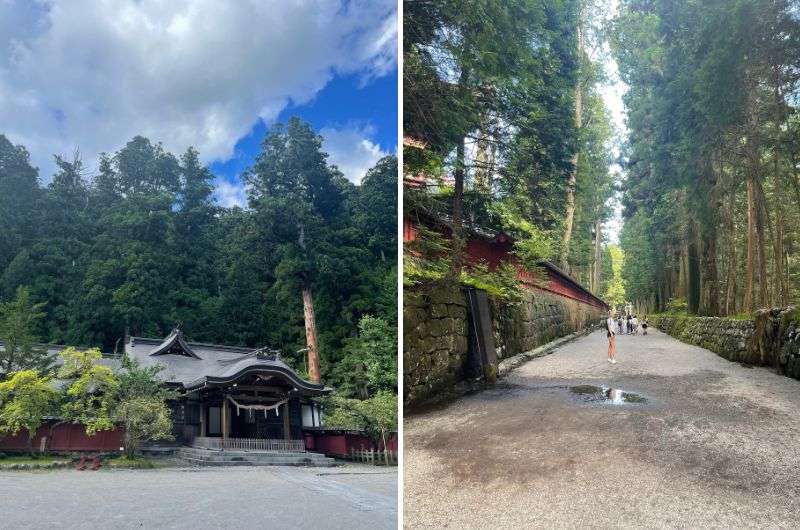
Take a forest trail to Futarasan Shrine
Distance from last stop: 350 m (0.2 mi), a 4-minute walk
Time spent there: 30 minutes
Price: free to enter the complex, small fee for some buildings
Opening times: 8 am–5 pm (you have to enter 30 minutes before closing at the latest)
Just a 7-minute walk from Toshogu is Futarasan Shrine. Toshogu’s older neighbor was founded in 782 by Shodo Shonin, the man who brought Buddhism to Nikko.
Around Futarasan, I noticed plenty of those 'golden Easter bunnies' as my girlfriend called them, or as they’re actually known, Japanese forest spirits. Feel free to drop a donation; it's good shrine karma.
There’s also a little shack behind the Haiden of Futarasan Shrine if you’re feeling like a coffee or tea. They make their beverages from water from the sacred spring at the shrine.
Tip: Read about etiquette at shrines and temples in Japan if you are apprehensive about doing the right thing at the right time.
Rinnoji Taiyuin is a tomb full of interesting historical facts and artefacts!
Distance from last stop: just a couple of steps
Time spent there: 45 minutes
Price: JPY 500 or JPY 1000 for a combination ticket that includes the mausoleum, the main hall, and the treasure house
Opening times: 8 am–5 pm (you have to enter 30 minutes before closing at the latest)
Ready for another tomb? It’s another good one, and it has a cute little story behind it! Taiyū-in is the mausoleum of Tokugawa Iemitsu, the third Tokugawa shogun, and the grandson of Tokugawa Ieyasu, the founder of the Tokugawa Shogunate, who has a tomb at Toshogu Shrine.
Lemitsu not only renovated Toshogu Shrine but also had Taiyū-in built facing Toshogu, because he wanted to spend all eternity hanging out with his grandad. Aw.
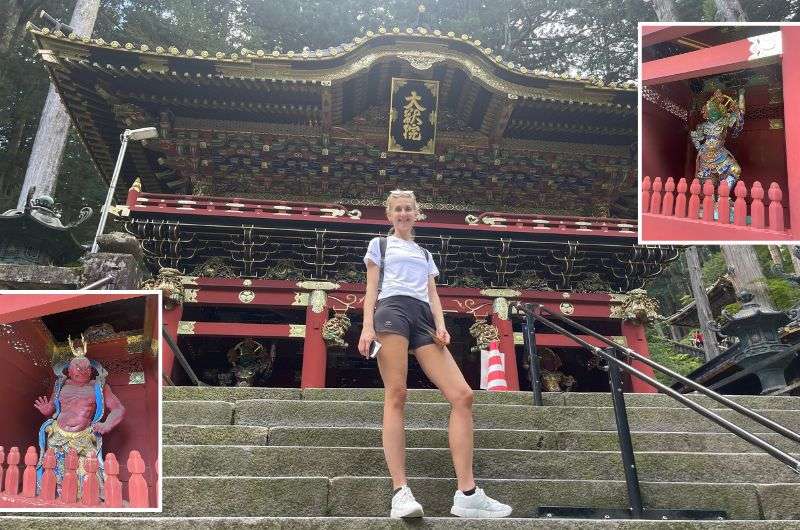
Rinnoji Taiyuin is practically next door to Futarasan Shrine. It's guarded by a series of increasingly well-armored keeper statues—the closer you get to the tomb, the more impressive their gear. A neat setup, kind of like walking through a gallery of ancient bodyguards leveling up before your eyes.
After a bit of a climb past a bunch of large lanterns with just the right amount of moss covering parts of the stairway, you hit the mausoleum at the top. A guide will talk a bit about the history and show you around. Again, be ready to take off your shoes.
Pro Tip: Bring your best socks—many tourists forget about the whole 'take your shoes off' thing in Japan.
Tickets: You can either pay as you go—i.e., JPY 500 for the mausoleum—or buy a combination ticket for JPY 1000 that includes Rinnoji mausoleum, the Rinnoji Main Hall, and the treasure house that is semi-boring and not worth visiting really. Then again, if it’s already on your ticket, go ahead and take a look.
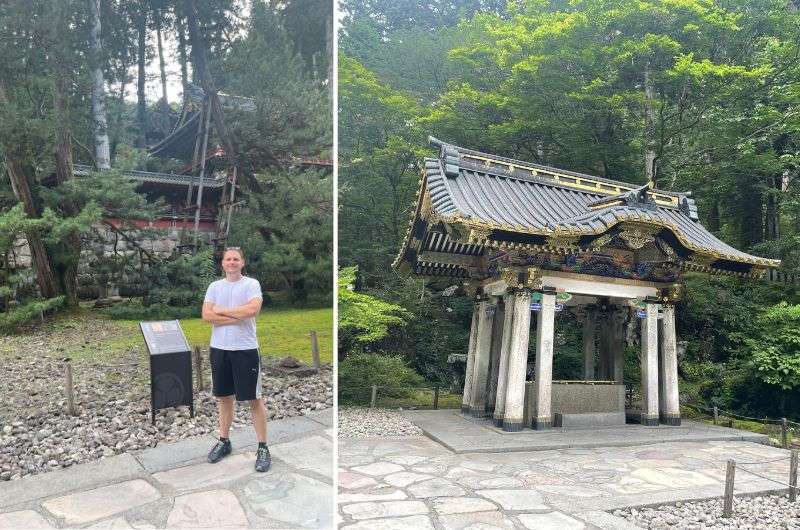
Rin’nōji Taiyū-in Mausoleum courtyard
The mausoleum has a truly stunning courtyard complete with drum towers used to mark the time of day, much like bell towers in European churches, just minus the Jesus. The structures are mostly wooden, which gives the place both a monumental and a cozy feel. It’s a bit odd to see some parts built in concrete instead of the original wood—not sure why they did that.
Along the path, there's a gorgeous five-tiered pagoda that blends beautifully into the forest setting. Actually, the entire path from Rin’nōji Taiyū-in to Rin’nōji main hall is magnificent. Which is a good thing for you, because that’s precisely the next stop on your itinerary today!
You might be wondering if you need to carry a half-day supply of food with you while you climb and descend the hill among the temples—you work up an appetite quite soon, I have to say. Well, I have good news for you: They expect hungry tourists in these parts! And as considerate hosts, they will feed you. You’ll see plenty of food stalls selling everything from fried chicken to pancakes.
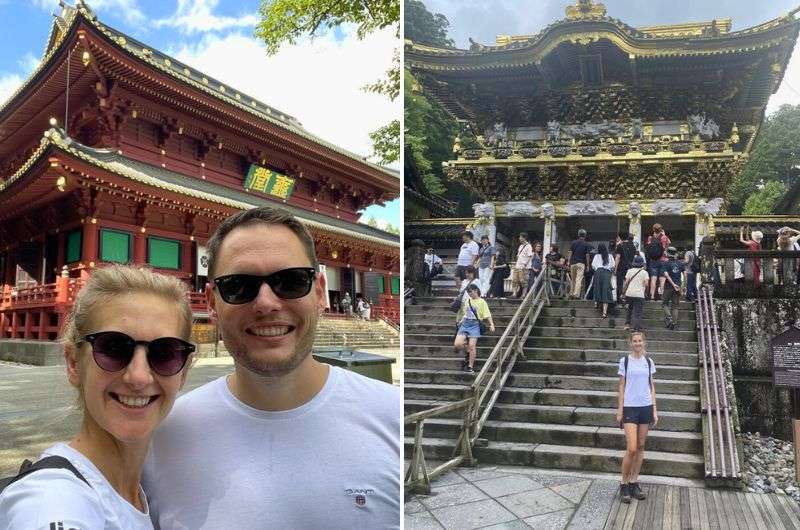
Rinnoji temple was impressive (from the outside), massive, and smelled surprisingly nice (from the inside)
Distance from last stop: 500 m (0.3 mi), an 8-minute beautiful walk
Time spent there: 30 minutes
Price: JPY 400 or JPY 1000 for a combination ticket that includes the mausoleum, the main hall, and the treasure house
Opening times: 8 am–5 pm (you have to enter 30 minutes before closing at the latest)
Through the towering cedars, you go down to Nikkozan Rinnoji, a beast of a wooden structure that you can't miss, practically shouting for attention as you approach. It stands out—not in the awkward way, but more like it owns the place. The price is just JPY 400 if you haven’t already bought the combination ticket at the mausoleum for JPY 1000.
Right in front of the temple, there’s a 600-year-old cherry tree. Yeah, um, it’s just a big ol’ cherry tree. Honestly, cherry blossoms aren't really my thing—I'm more of a cedar guy. But hey, credit where it’s due, it’s a pretty impressive old tree. There’s also a big bell in a little house right outside the main hall, and to me, this bell outshines even the Main Hall.
The Main Hall is nice and all (and, like I mentioned, very large), but it’s not exactly different from the many, many other halls you’ll see all over Japan. And not surprisingly, the inside isn’t all that great either. But there is a big bonus inside: it doesn’t smell like feet! It was really pleasant in there!
Behind the golden pillars of the Main Hall, there's a forest path lined with cedars that seriously impressed me (again with the cedars, I know, but they’re truly fascinating!). It would be even better minus the 5000 people crowding it.
Warning: The Nikkozan Rinnoji Temple was extremely crowded when we visited in the summer, and the lack of regard for other people shown by some of the tourists there was frustrating. It was nearly impossible to get a quick shot of whatever you pointed your camera at without someone blatantly ignoring your existence and walking right in front of you.
We had bought the Rinnoji combination ticket, so the treasure house was already included in it, so we popped in. Gotta say, not sure I’d go again. If you feel like skipping it, you won’t be missing much. The little garden outside the treasure house was nice, though.

Look at us making the Shinkyo Bridge look good! What you can’t see it the busy road right in front of us
Distance from last stop: 500 m (0.3 mi), an 8-minute walk
Time spent there: 10 minutes
Price: JPY 300 or free if you don’t need to walk on the bridge
Opening times: 8 am–5 pm (to walk on it, but it’s always there for photos)
Even though it’s much closer to Nikkozan Rin’nōji Temple, Shinkyo Bridge is officially part of Futarasan Shrine. It's often touted as one of the top three prettiest bridges in Japan, which I agree with, but it’s good to acknowledge that it’s being massively assisted by the pretty background and the Daiya River views.
That’s very important, because in reality, Shinkyo Bridge is at the base of the hill, outside of the cedar forest in Nikko town proper. What that means is that if you’re not looking at the bridge from the correct direction, you don’t get any nature in the background and instead capture a bunch of busy roads full of cars and tourists. Then, Shinkyu Bridge loses part of its charm.
And no, you can’t walk over it to the other side of the river. That’s right, it’s a bridge that ain’t bridging! But no worries, there’s another, modern-day bridge right next to it that is actually meant for traffic (of the automobile and foot variety) where you can get the best angles from.
If you really want to, you can pay JPY 300 to walk on the bridge, but it’s a dead-end journey—you’ll have to double back and use the other bridge to actually get across if that’s where you’re heading.
Story time: Legend has it that the head priest of the area needed a way to cross the river, so he called upon the mountain deities. In response, two snakes slithered up and transformed into this stunning crimson bridge.

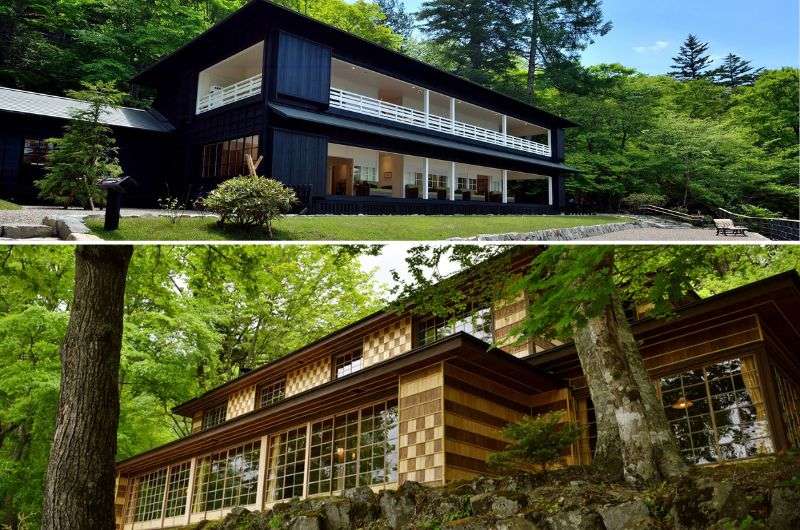
The Imperial Villa—a mix of Edo and Meiji architecture
Distance from last stop: 1.3 km (0.8 mi), a 20-minute walk or a 10-minute drive from the parking lot at Toshogu Shrine, where you left your car in the morning
Time spent there: 1 hour
Price: JPY 600
Opening times: 9 am–5 pm (last entry at 4 pm), closed Tuesdays
If you drove to the temples this morning, now is the time to go get your car and drive the 10 minutes to the parking lot at Nikko Tamozawa Imperial Villa Memorial Park. Otherwise, walk from Shinkyo Bridge, it’s only a 20-minute stroll.
Pro Tip: Let me warn you that whenever I was driving in Nikko in the morning, I got stuck in traffic because of this stupid, centrally located traffic light near the bridge.
The Imperial Villa is a grand estate that once served as the country retreat for two Japanese emperors. Surprisingly, this place was way calmer and less crowded than most other places on your Nikko trip plan, which snagged it a huge bonus point from me.
The villa is a mix of Edo and Meiji architecture with bits of Western flair thrown in, and you do get a feeling of “grand summer hangout”.
Spanning an impressive 30,000 m2 (about 322,900 square feet), the villa is absolutely massive, and you, too, can walk through its 106 rooms (with a guide). Unfortunately, after room no. 10, you’ll start getting a little bored, because for some reason, the Japanese leave the rooms of all these impressive buildings bare.
That’s some missed potential right there if you ask me. They do have carpets inside, so that’s a nice change. Just make sure to put on your nice socks, because shoes do have to come off. My girlfriend learned that the hard way.
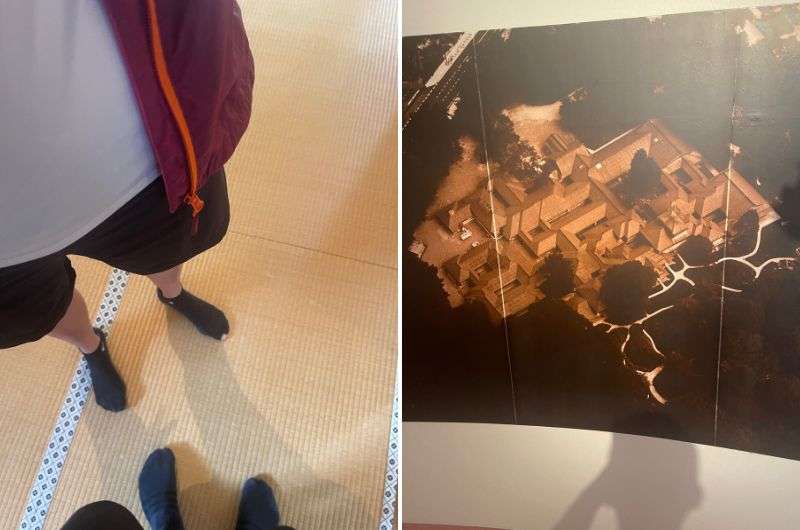
Before the leaky toe becomes the new fashion, I recommend wearing nice socks to Imperial Villa
Just as impressive are the gardens surrounding the villa, which are nice to take a stroll around. The garden incorporates elements of formal Japanese garden design, yet maintains a natural feel. It’s got that regal charm without trying too hard.
Once you’re all villa’d out, you’ve seen all there was to see on your first day in Nikko. How’d you like it? Fabulous, right? Well, wait until you get to day 2, because Nikko’s nature is where it’s at! And there’s a lot more than just majestic cedars waiting for you tomorrow.
I absolutely loved Nikko despite being mostly let down by its restaurants, and that’s a big deal for me. Usually, when a place has terrible restaurants, I just hate it altogether, but Nikko’s is so special that I forgave it.
A restaurant in Nikko that I think you should give a try for dinner is Grill & Steak Myōgetsubō. It’s close to the Shinkyo Bridge, and the food is of very good quality. The best part is the location—the restaurant is nestled among the trees- because you’ll be glancing at lush greenery through the large windows.
Tip: If you want to eat well, make sure to visit Kyoto and Hakone. It’s these two cities that impressed me most when it comes to exquisite eats. Read about my favorite restaurants in my Japan Food Guide.
And that’s a wrap for day 1!
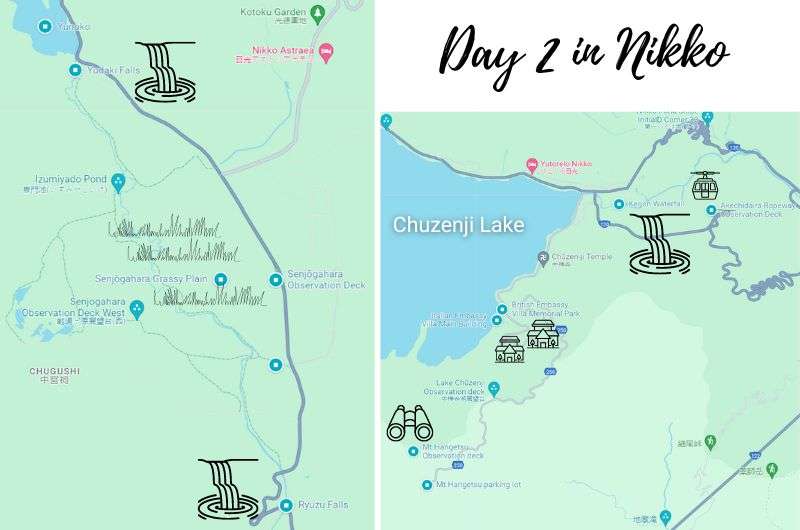
A map showing the stops on day 2 of your Nikko itinerary. I’ve put the entire route into Google Maps for you, it takes you directly to each stop. Just click on the link and follow along
Main sites visited on day 2: Hangetsuyama Hike above Lake Chuzenji, Kegon Falls, Yudaki Falls and Yunoko Lake, Senjōgahara Marshlands, Ryuzu Falls, British and Italian Embassy Villas
Restaurant tips: Grill & Steak Myōgetsubō | Numataya (sushi)
Hotel recommendations: Fairfield by Marriott in Nikko
Further reading: Japan Travel Tips
I hope you’re a morning person, because today you need to be one. Trust me when I say that once you immerse yourself in the nature around Nikko, you’ll be glad you dragged yourself out of bed.
When I recall Nikko, I always remember Hangetsuyama and Kegon Falls first and all the historic sights second. And for me, the historical monuments are none to second in Japan. That’s how nature is good.
First, you’ll head up to the hills to get a good overview of the land, and then you’ll explore the surroundings step by step, conquering everything from waterfalls and lakes to, well, more waterfalls. Let’s go!
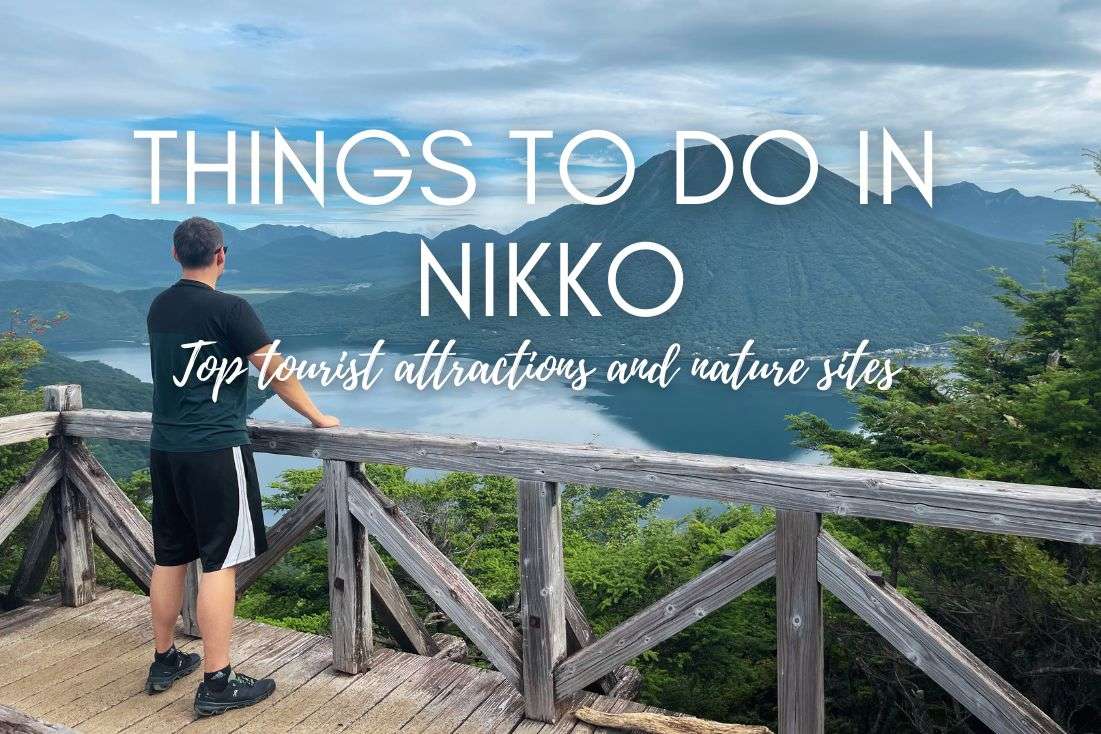
Hike to the amazing view of Lake Chuzenji
Distance from Nikko Fairfield by Marriott: 32 km (20 mi), a 45-minute drive
Time spent there: 1 hour
Price: 0
Opening times: 7 am–5 pm
You’ll need to drive 45 minutes out to Lake Chuzenji from Nikko, and then make your way up the winding road all the way up to the Mt.Hangetsu parking lot. Gates open at 7 am, and I’d recommend you’re there at that time. I know, I know, but you traveled all the way to Japan to see things, right? So get a move on!
Pro Tip: You can't enter earlier, so we, being jet lagged, waited there 30 minutes in front of the gate.
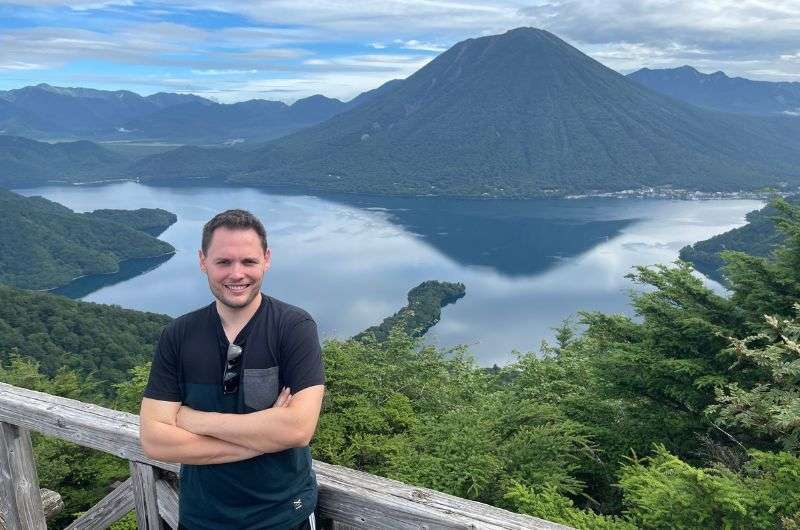
Parking is free, and the subsequent hike to Mt. Hangetsu Observation Deck is only 30 minutes long. But the views you get at the end make this a must-see.
You’ll get to stand there, pretending you conquered the mountain despite having driven up most of the way, and take in some absolutely perfect views of Lake Chuzenji, which is Japan’s highest natural lake, and Mount Nantai, towering over it at 2,500 meters (8,200 ft).
Weather-permitting, of course, I’m not guaranteeing anything if there’s a tablecloth of fog.
The Ultimate Tip: Try to hike it on a sunny, low-haze day. This is the spot where I had the best views of Mount Fuji during the sunrise. And after seeing Chilean Volcanoes, I was not impressed by Fuji except for this sight.
The hike to the observation deck is short at just about a kilometer (0.6 miles) long with a modest ascent of 120 meters (394 ft). If you're feeling adventurous, continue another 200 m (656 ft) through what can only be described as a 'haunted' forest.
Beware, though, there are bears in the area. And monkeys. And truckloads of mosquitoes. Oh, and we met a person who said they saw a snake right next to the path. So, watch your step, bring a bell, douse yourself in bug repellent, and don’t show the monkeys your snacks.
Next stop is Kegon Falls!
Distance from last stop: 9.5 km (6 mi), a 15-minute drive
Time spent there: 1.5 hours
Price: JPY 570 for the elevator, the top platform is free
Opening times: 8 am–5 pm
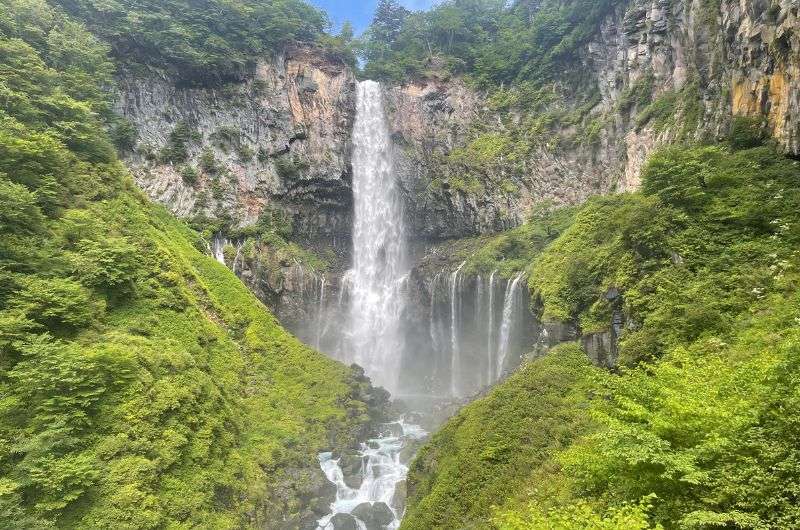
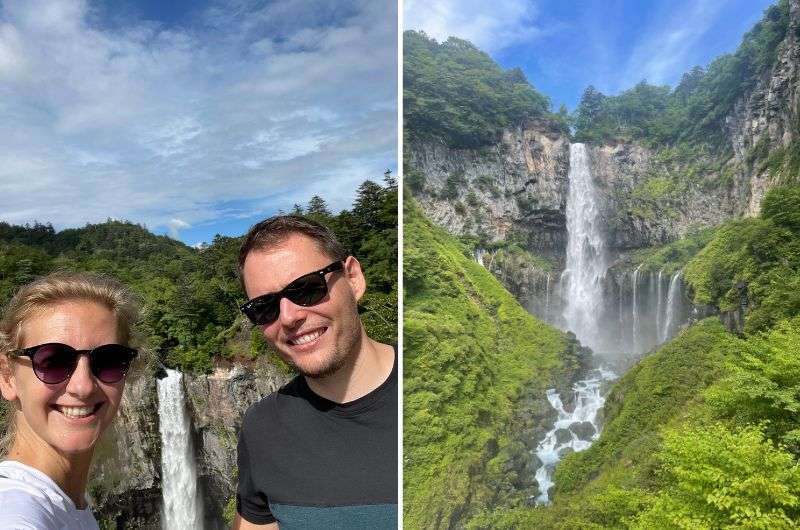
Arguably, the most picturesque and famous waterfall in all of Japan is waiting for you here. I loved the fact that it falls directly from Lake Chuzenji above, not from the river like others.
Why Should You Visit Kegon Falls
Hop back in your car and head back down the mountain to your next stop, the tallest waterfall in Japan—Kegon Falls. This place is simply stunning, with the ravine and vegetation complementing the waterfall in all the right ways. The fact that it flows directly from Lake Chuzenji adds a layer of awe to the scenery.
It’s easy to park at the nearby parking lot, and walking onto the top viewing platform is entirely free. But it would be a big mistake to stop there—there’s an elevator that’ll take you down to lower levels, and those afford you even better views! From the lower Kegon Falls observation area, the falls hit you from a whole new angle, and even better than from above.
And if you peek just right from the bottom deck, you’ll catch the secondary waterfall that's big and burly, just casually hanging out beside the main event, but being just as impressive.
You might think it's not worth spending money on going down by the elevator. But this is absolutely the best view of the Kegon Falls there is. I was very happy I paid and went down to the viewing platform. It does not pay to be cheap in this case.
You’ll want to make sure you have 1.5 hours to visit Kegon Falls, because the place is really a stunner, and to just run through it would be a huge shame.
Tip: If you have the time, again, early birds win!—check out the nearby Akechidaira Ropeway Observation Deck that offers a bird's-eye view of the watery beast that is Kegon Falls. The angle from which you view Kegon Falls from the ropeway—i.e., straight on with the lake behind it—makes it look like somebody left Lake Chuzenji’s faucet on.
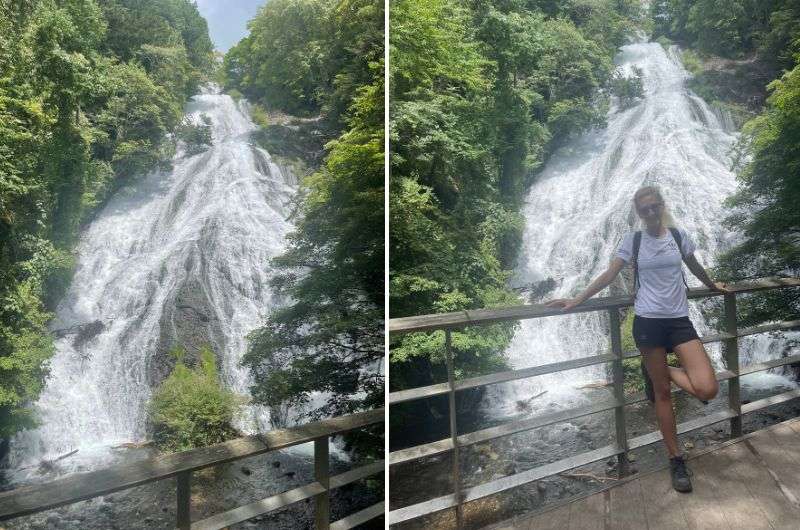
Yudaki Falls
Distance from last stop: 12 km (7.3 mi), a 20-minute drive
Time spent there: 2 hours minimum
Price: 0
Opening times: Always open
On to more waterfalls! Drive 20 minutes to Yudaki Falls—you’ll leave your car there when you head to the falls and then continue with a walk around Lake Yunoko.
In this case, it's pretty straightforward. Just hit it in your Google Maps and you will just drive straight to the falls, + there are so many road signs it's almost impossible to miss it.
The goal is to stare at Yudaki Waterfall from the top for a bit, and then make your way through the short but steep (lots of stairs) route to the bottom of the falls, where the views are much more dramatic. Yudaki Falls, standing tall at 75 m (246 ft) and stretching 25 m (82 ft) across, looks more like a ski slope than a trickle of water. Before you head down, stop by the little bistro for a bite to eat or some drinks if you want.
I loved the walk down around the falls, but beware the wildlife—you’ll see monkeys for sure, and hopefully you will not see the bears, but they are there, so feel free to talk loudly or bring a bell. There are also so many dragonflies that had us wondering if they just put them there for the tourists to love Yudaki Falls more.
Continue on to Lake Yunoko, born from volcanic origin (it formed when lava from Mt. Mitsudake dammed the Yukawa River). It’s a picturesque lake with a slight sulfur smell, but it’s worth enduring for the gorgeous nature around it and the views of the mountains in the background.
Tip: Speaking of volcanoes and eggs, add Owakaduni to your Japan itinerary. It’s a volcano close to Mt. Fuji—read more about it in my Hakone Guide. You can even buy black eggs there (turned black by the iron and sulfur in the water they are cooked in) that extend your life by 7 years per egg!
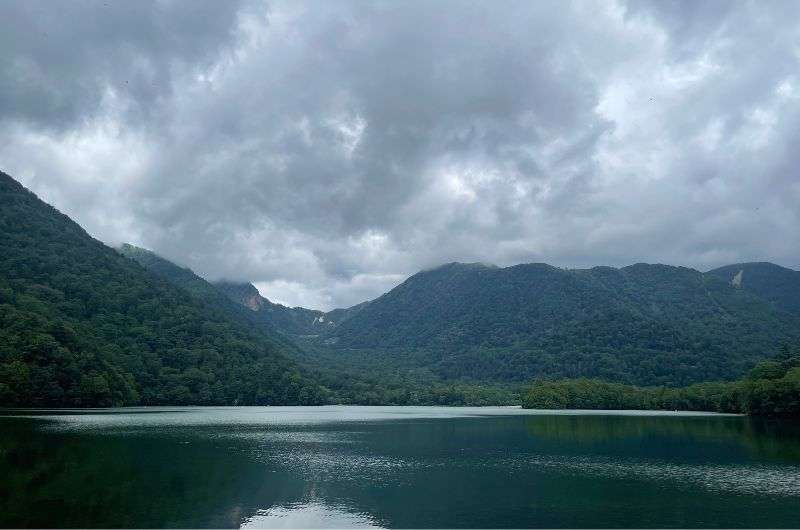
Beautiful walk around Yunoko lake...only we were in a bit of a hurry because the sky didn't look too positive
Circumnavigating Yunoko Lake takes about an hour on an easy trail. You can rent a paddleboard or even take a dip if you’re feeling brave and sweaty.
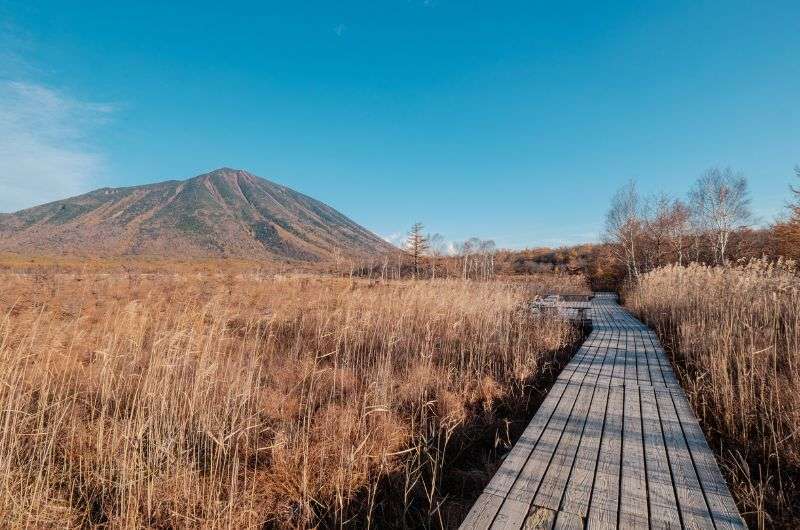
Senjōgahara Marshlands—walk along the wooden paths
Distance from last stop: 3 km (1.8 mi), a 5-minute drive
Time spent there: 5–30 minutes
Price: 0
Opening times: Always open
You could spend a couple of hours walking along the wooden paths of Senjōgahara Marshlands, but do you really need to? First of all, you don’t have that much time since you only chose to visit Nikko for 2 days, and second, let’s be honest, marshlands aren’t exactly extremely interesting.
I get that they are very important for the ecosystem, but if it weren’t for the spectacular mountain views in the background, it would just be a flat, boring, grassy area.
Senjōgahara is full of trails, several observation areas, and even picnic tables, and the main thing to do there is to walk and look at the mountains (I really don’t think anyone is spending very much time staring down at the ground). It’s all very peaceful and pretty unless you are there on a weekend when it’s just pretty.
We took an hour and walked around the main parts, but unless you have some special interest in marshlands or extra time on your hands, you can just stop at the main observation area by the road from Yudaki Falls—here it is on Google Maps.
There’s a parking lot right across the road (and a café of not great quality too). This is the place that has the best view directly over the grassy plains with the mountains in the background. But there’s no way to venture into the marshland from here.
If you think you’ll die of FOMO if you don’t walk on the wooden walkways, consider parking a bit to the south at the Akanuma Nature Information Center. From there, you can easily cross the road and enter Senjōgahara.
Within about 5 minutes of walking on the wooden walkways, you'll reach another observation deck, offering a quick yet satisfying glimpse into this ecosystem. This time, you’ll be walking along the forested area, seeing the grassy plains from the edge of the forest where the river flows.
Just don’t make a wrong turn on the wooden boardwalk, you could accidentally get to Ryuzu Falls, which is your next stop.
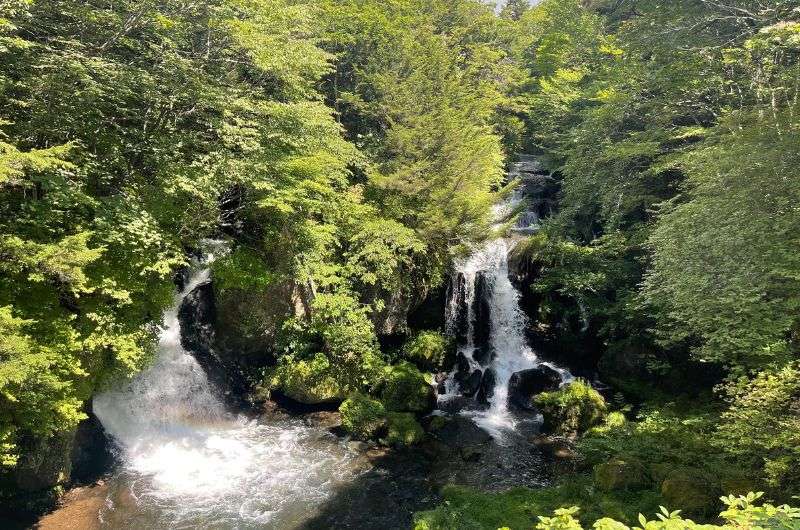
And the falls number 3, Ryuzu Falls!
Distance from last stop: 2.5 km (1.5 mi), a 5-minute drive
Time spent there: 30 minutes unless you get stuck staring at the falls from the café for longer
Price: 0
Opening times: The falls are always open, the café’s opening hours at 10 am–4 pm
You’re almost done with all the sights for your second day in Nikko and you’re getting close to mid-afternoon by now… Keep the energy up! Your last stop has a closing time of 5 pm, so get hustlin’.
Ryuzu Falls isn’t as impressive as Kegon or even Yudaki if we’re talking solely the water flow. But that’s just not how you look at waterfalls, folks! You have to take in the bigger picture. Ryuzu offers wonderful views from the path around the falls and the lush foliage around the falls makes a nice frame for the cascade of water. The falls split into two at the bottom, so it’s like a double-whammy.
Fun Fact: As a bonus, you’ll want to know that Ryuzu means “Dragon Head”, and I’m certain that you’ll spend a few minutes trying to see it—best viewed from a café that sits right smack in the front of the falls. Not gonna lie, you’ll need a lot of imagination if you’re visiting in the summer when the leaves of the trees around it are covering a large part of the dragon’s face.
There’s an asphalt path that leads along the dragon’s body, erm, I mean river, and you’ll need to make your way up quite a few flights of stairs if you want to walk it (you should). Granted, it’s only about 200 m (0.1 mi) one way. Just so you know, this path would lead you straight into Senjōgahara if you don’t turn around in time, so don’t get overzealous.
You can park close to the café that’s the main viewing area for Ryuzu Falls, or, because that gets full quite often, at a secondary parking lot at the other end of the walking path along the river. Parking is free and crowded.
British Embassy Villa on top, Italian Embassy Villa on the bottom... two very different ladies. The British one is dark on the outside but brighter on the inside (details on www.nikko-nsm.co.jp/en/)
Distance from last stop: 6.5 km (4 mi), a 10-minute drive
Time spent there: Up to 1 hour
Price: JPY 450 for both villas or JPY 300 each if bought separately
Opening times: 9 am–5 pm, café and tea room close about an hour earlier
It's about a 10-minute walk from the Utagahama parking lot to the villas, which costs JPY 500 per vehicle per day. You can’t drive closer to the memorial park anymore, something about nature conservation.
Pro Tips:
First things first, this is a memorial park, meaning that the villas aren’t in use as embassies anymore (and haven’t been since the 1990s), but it sure would be cool to be an ambassador based there! Standing right next to each other on the shore of Lake Chuzenji with superb views over the lake and, if you were the Italian ambassador, even Mt. Nantai.
Each villa is built in a different style, but you’ll clearly notice the fusion of European and Japanese architecture. The British villa is dark on the outside but brighter on the inside, while the Italian one is the exact opposite. Both are set up to showcase how they would’ve looked back in the day, but only the British one has a formal exhibit inside.
Grab a tea or coffee in, ideally with views from the patios on the first floor. The one in the British villa is nicer and open-air.
After your visit to the embassies, it’s time to head back into Nikko—you’re about 30 minutes away from Nikko Fairfield by Marriott. You’ll need a shower first before heading out to dinner after all of today’s exploration.
And that’s the end, my friends. Your Nikko itinerary is complete. I know some people want to visit Nikko as a day trip from Tokyo, but I feel that’s a terrible waste of potential. Nikko deserves at least 2 days of your time.
Before you plan your trip to Nikko, I will provide you with some useful information gathered during my visits.
Two days in Nikko should be your minimum—day trips from Tokyo just scratch the surface, missing all of the natural attractions beyond the city. If you’re short on time in Japan, let me help you out with that: Tokyo can spare a day or two; trust me. It’s just a big, busy city with next to no attractions worth seeing. Nikko's refreshing change of scenery beats the city buzz any day.
Yes, but a day trip hardly does it justice. If all you can do is a day trip to Nikko, then do a day trip. But you may want to look at your Japan itinerary to see if you haven’t allotted too much time to other places and move your schedule around a bit. You'll want more time to explore Nikko beyond the basic sights and really soak in the area's natural beauty.
For the town and main shrines, no, you’ll be walking (up and down the hill!) for those. But for exploring wider natural attractions like lakes, hikes, and waterfalls, it’s not so foot-friendly. You’ll want wheels, and not just the public transit kind. Rent a car so you can cover more ground on a flexible schedule.
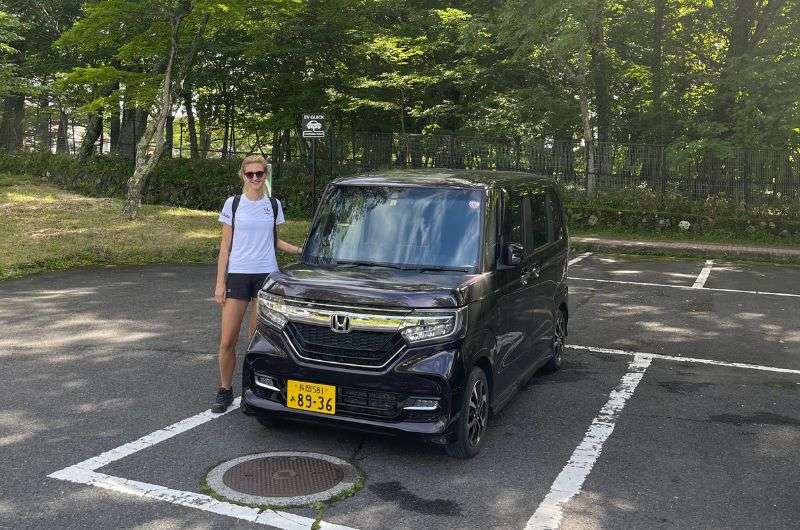
A car will definitely come in handy. Try not to laugh though :D
Nikko shines year-round with something different each season, but peak season is April to November. Spring is traditionally busy because of sakuras blooming, but in Nikko, even more popular is fall with the colorful leaves on the trees, adding even more wow to the nature. It’s at this time of the year that the “dragon” at Ryuzu Falls really comes alive (because of the red leaves… dragon colors… get it?). Avoid national holidays unless you love crowds, but whenever you go—unless it’s winter—you’ll encounter a lot of people, especially at Nikko’s attractions like Toshogu, Futarasan, Rin’nōji.
Yes, the JR Nikko Line is covered by the JR Pass. This line operates between Utsunomiya Station and JR Nikko Station, with all trains on this line being local services that stop at all stations. So, if you have a JR Pass, you can hop on and off along this route without any additional cost.
Hello from Kegon Falls!
Toshogu Shrine is an entire complex of buildings that you’ll need 1.5 hours to cover comfortably. There’s the main hall, the staircase up to the tomb, the White Gate, and of course, the “see no evil, hear no evil, speak no evil” monkey carvings you’ll need to find! You could run around in an hour if you’re in a time crunch, but remember Toshogu is Nikko’s top sight, so maybe plan better instead so you don’t need to rush. This place is better than most other temples and shrines in all of Japan!
This post contains affiliate links. I earn a small commission if you make bookings through my links, at no additional cost to you. Thank you for your support!
Overview of 2 days in Nikko + map
Where We Stayed, Nikko: Fairfield by Marriott
Day 1 of Nikko Itinerary: All the Amazing Shrines in Nikko National Park
Day 2 of Nikko itinerary: Nikko’s epic nature
How many days should I spend in Nikko?
Is Nikko worth a day trip from Tokyo?
What is the best time to visit Nikko?


Hi, I’m Jan. I travel fast and intensely, whether I’m exploring the buzz of Tokyo in 3 days or road-tripping through mountains and beaches on a 3-week Thailand adventure. And no matter where I am, you’ll always find me in a comfortable hotel at night and eating the best food.
If that sounds like your kind of journey, hop on board, and let’s explore the world together!
I started this blog after realizing how tough it can be to find reliable, authentic travel info. You wouldn’t believe how many “travel bloggers” never even visit the places they write about! On Next Level of Travel, you can count on my full honesty and insights drawn from my firsthand experiences.
Here’s the deal: not every destination is all superlatives and unicorns. I’ll let you know if a tourist attraction isn’t worth your time, like skipping overrated stops in my 2-week Spain itinerary. And when I find something truly special—like the perfect mix of culture and nature in Cape Town—you can trust that it’s worth adding to your itinerary.
Comments | Thoughts? Give us a shout!
Thanks so much. Look forward to hearing back from you.